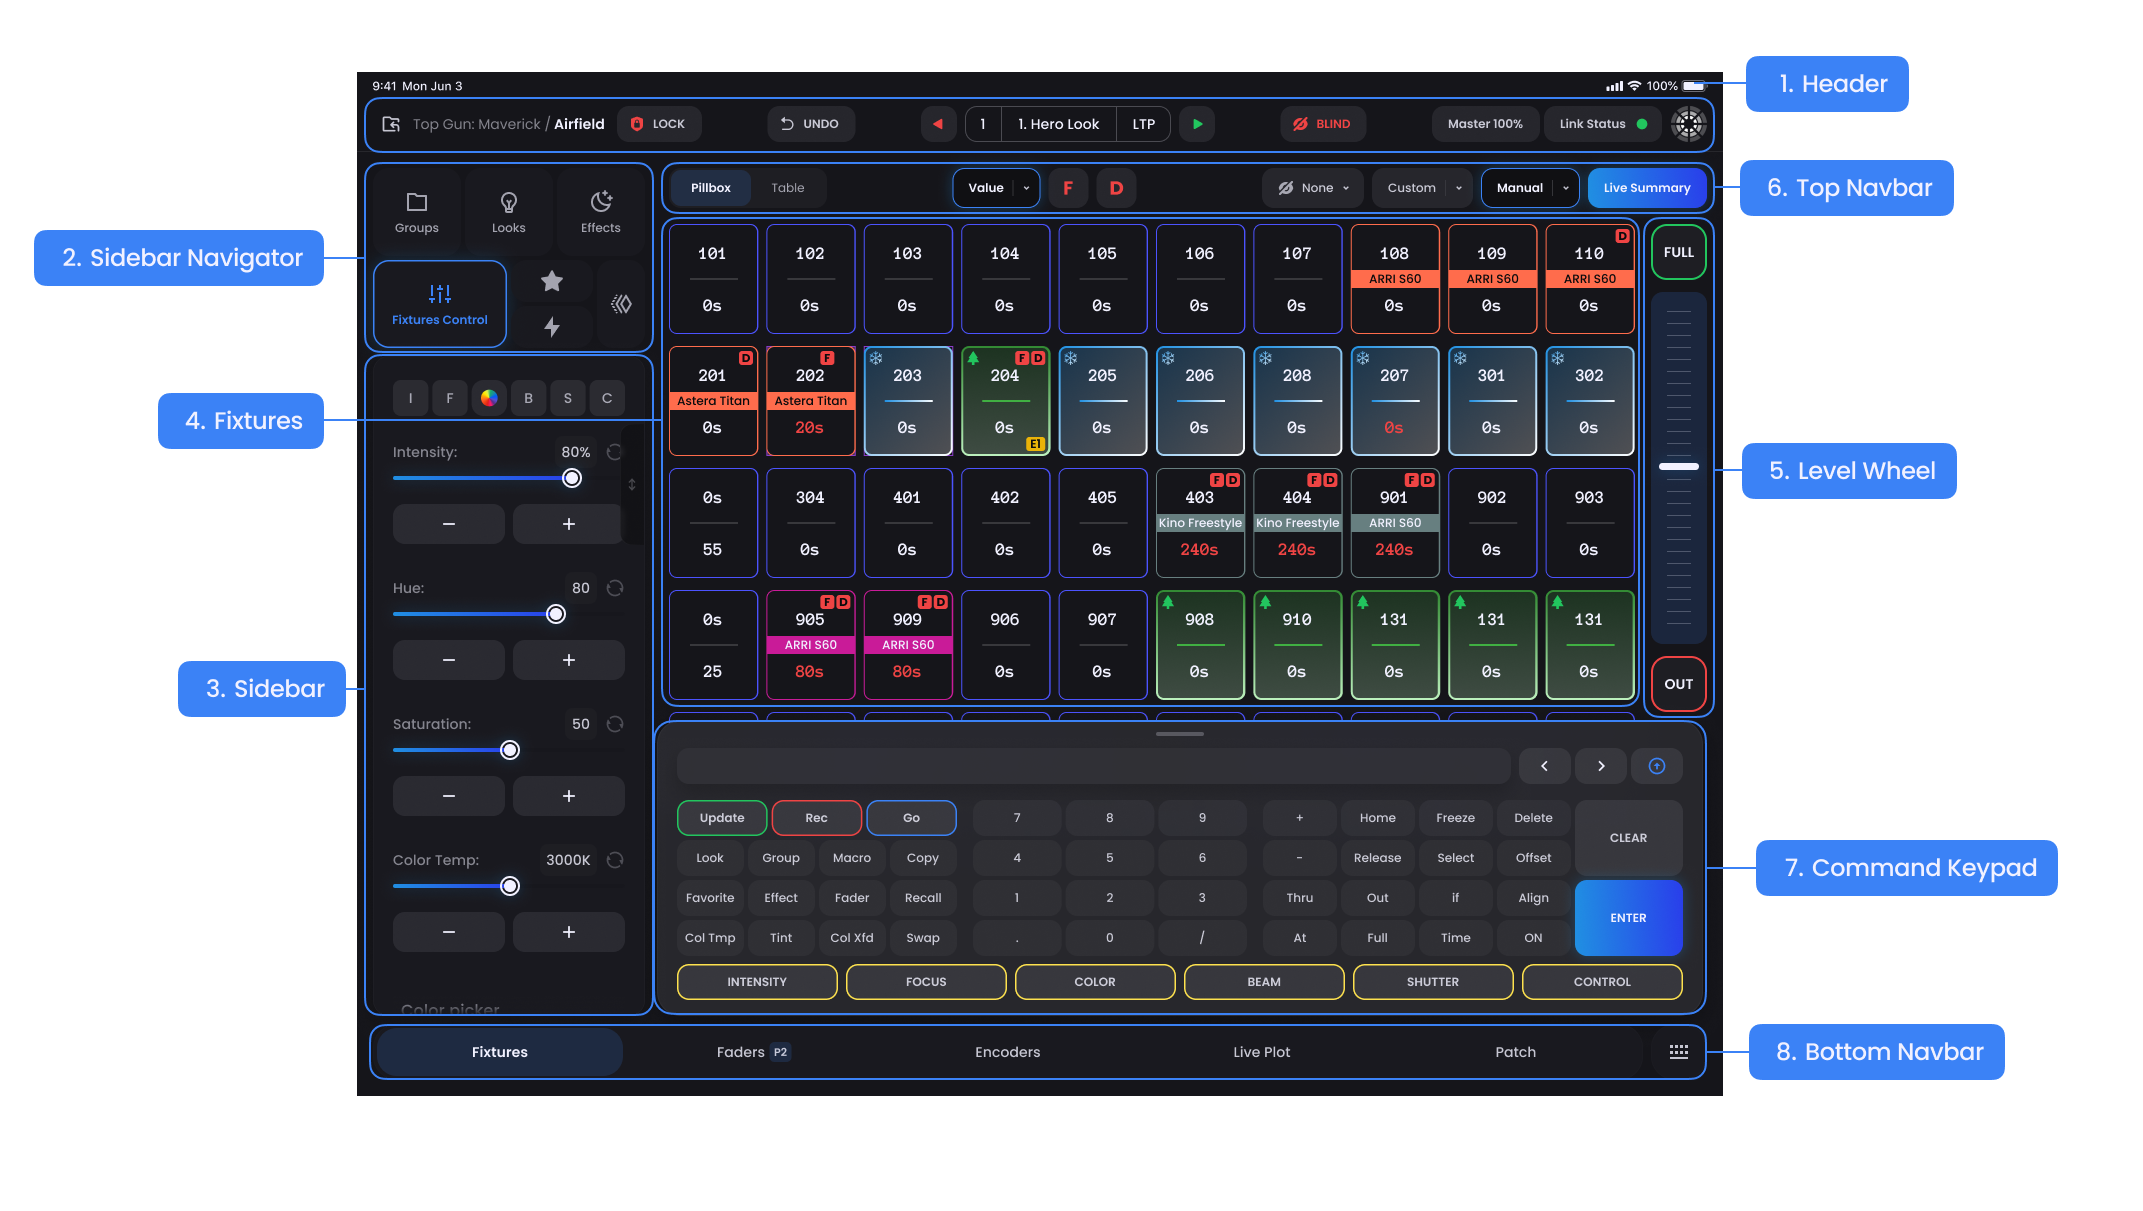
Overview of the Interface

Header
- This is the central hub where you can see and configure your project level information.
Sidebar Navigator
- This navigation pane provides quick access to key components, the building blocks of lighting control. Double-tap the specific component's tab to open its Expanded View.
Sidebar
- The Sidebar dynamically updates to show you the stored elements in each component or relevant controls. In general you can perform some quick actions by tapping on the three-dots ··· on an individual element (ie. Group, Macro, Look), while the full edit capabilities are in the component's Expanded View.
Fixtures
- In the default Pillbox View, each Pillbox represents a Fixture. If a Fixture has cells or modules within the light, those will be represented as dotted cells attached to the main Pillbox (ie. 1.01, 1.02)
Level Wheel
- The Level Wheel is designed for precise control over lighting levels, offering smooth and accurate adjustments. A quick flash to FULL and OUT button are provided at the top and bottom of the wheel.
Top Navbar
- Here you can change states of information displayed in the Fixtures Pillbox or Table Views. See just what fixtures are currently outputting or what look a fixture's intensity is coming from, by a simple toggle.
Command Keypad
- This is your go-to for entering commands and shortcuts, making batch operations incredibly easy and efficient.
Bottom Navbar
- This panel offers quick access to the major features of Blackout.
