Faders
Faders allow you incredible flexibility in playing back your Sequences, Looks, Effects, and making quick adjustments manually to Fixtures that you can then assign to hardware buttons on a MIDI controller.
Almost anything can live on a Fader. The simplest way to create and use a Fader is to tap the Load button on the top of the Fader.
Fader Types
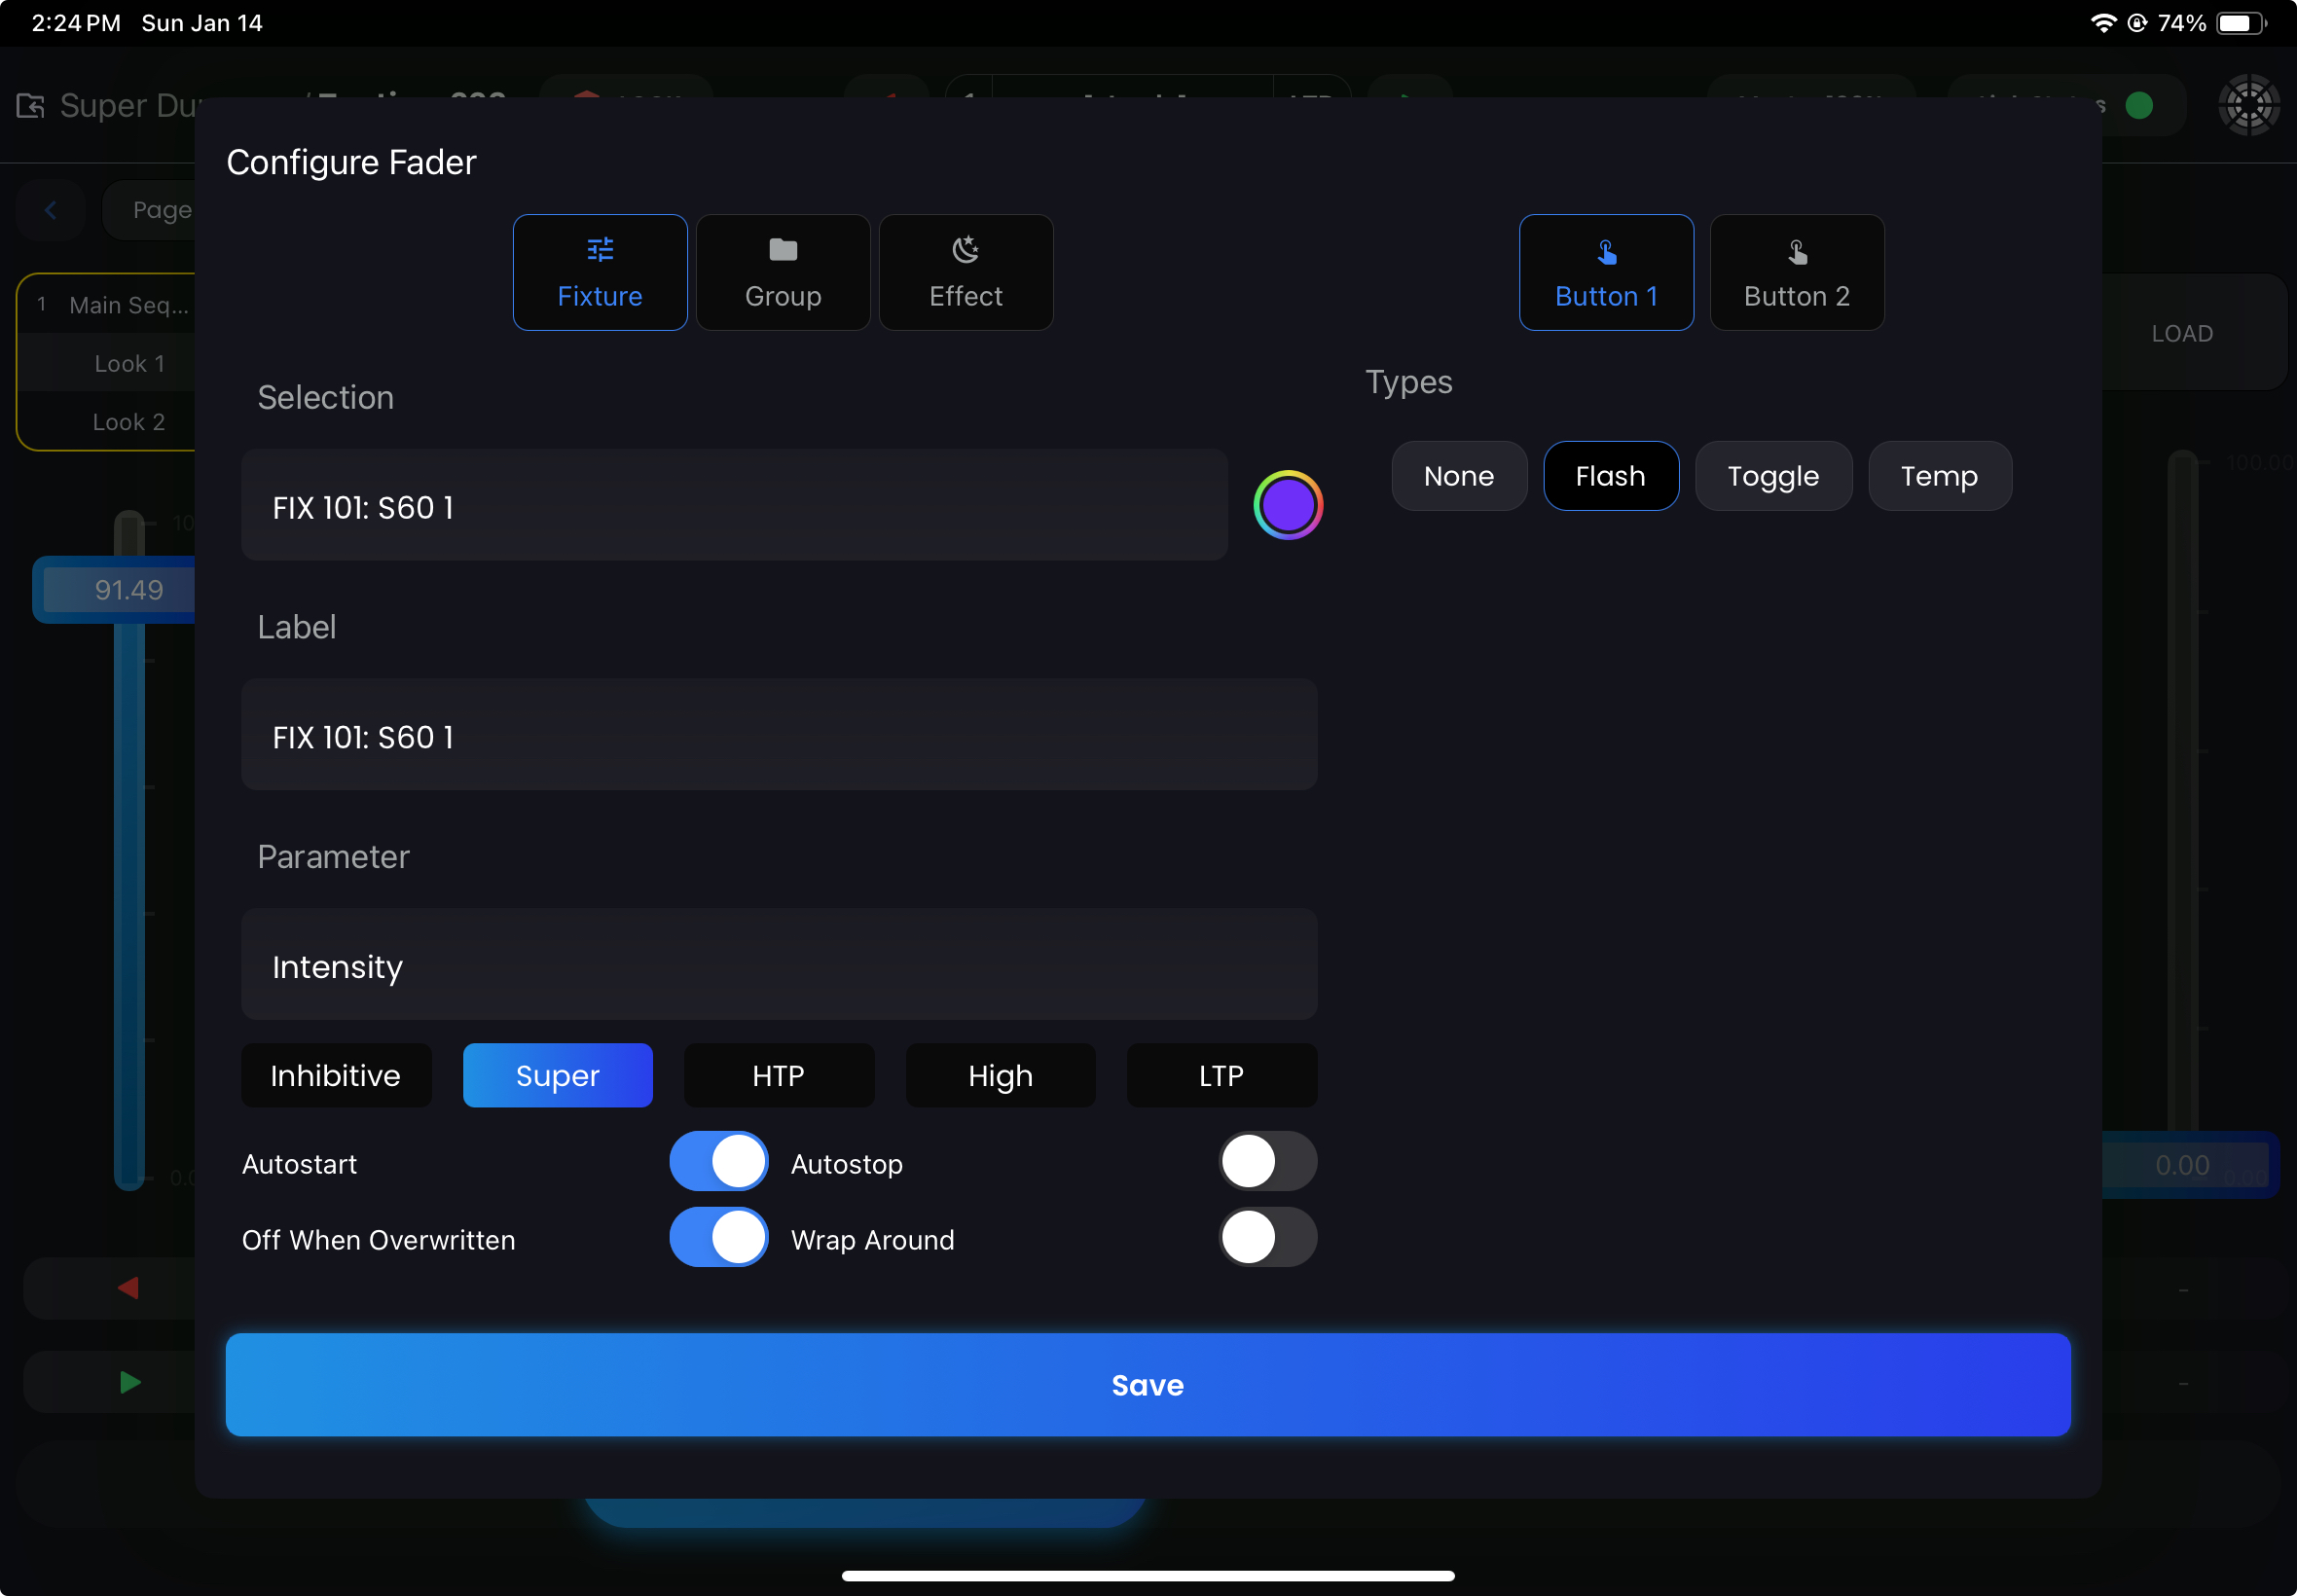
Here you can quickly load a Fixture, Group, or Effect directly into this Fader. We will refer to Faders that are loaded directly with one of these objects as Direct-Load-In Faders.

Simply tap the "Selection" field to find your object, label it, and select what parameter from that object you want this Fader to control. Most people will want to control the Intensity. Below that you have priorities that will affect how the Fader is played back. Depending on what you select, the Fader can have very different results.
Fader Priorities

There are 5 priority states:
LTP (Latest Takes Precedence) - Default State:
- This is the standard mode for handling conflicting control inputs. In this state, if there are multiple commands for the same control channel, the most recent command takes precedence over the others. This is commonly used for non-intensity parameters like color, gobo, or effects.
High:
- This priority is a step above the normal LTP. It means that any command given at this priority level will override commands in the standard LTP priority. This is useful when you have a particular control or effect that you always want to take precedence over others set in the normal LTP mode.
HTP (Highest Takes Precedence):
- In this mode, for intensity parameters, the highest value from any control source is used. This is typical for controlling the brightness of lights, where you might have multiple Faders or inputs affecting the same light, and you want the highest intensity value to be the one that's output.
Super:
- This is the highest level of priority. This priority is typically reserved for very critical objects that must always take precedence in your lighting setup, regardless of any other settings or changes happening on lower priority levels. By default, Super Faders are "Exclude from Record" which means the values they are affecting will not be recorded into any Looks you create.
Inhibitive:
- This priority state is used for overriding levels. Inhibitive Faders can be used to lower the intensity, regardless of what is set in other priority levels.
Additional Fader Options

In addition to priority levels, there are also additional settings for each fader:
- Autostart:
- Turns the Fader ON when brought up from 0.
- Autostop:
- Turns the Fader OFF when brought down to 0.
- Off When Overwritten:
- This Fader is turned OFF when another Fader overwrites, or takes control over all of the parameters within this Fader.
- Wrap Around:
- This option is only for Sequence Faders and enables the Sequence to loop back to the first Look when the GO command is executed after reaching the Sequence's last Look.
- Exclude From Record:
- Prevents the Fader output from being recorded.
- Additive:
- Enables additive control, where multiple Faders can cumulatively affect a parameter, seamlessly transferring the value from control to control. If disabled, the Fader will snap to the value the Fader is affecting.
- Disable Additive When Full:
- This disables the additive effect when the Fader reaches its full value.
Button Types
- Flash: Temporarily activates the Fader while pressed.
- Toggle: Switches the Fader on or off with each press.
- Temp: Activates the Fader for a temporary, predefined duration.
- Up Time/Down Time: Sets the transition time for the Fader to reach its maximum or return to its minimum.
- Hold Time: Two modes are available:
- Manual: Requires a second tap to begin the transition down.
- Auto: The Fader waits for a specified duration before automatically transitioning down.
