Looks
After adjusting your fixtures to the desired settings, you can create a Look for quick playback. Looks allow you to quickly recall recorded lighting states (Effects included) for a selection of Fixtures or the entire rig.
INFO
In Blackout, Looks are similar to what are known as "Cues" on other consoles. We prefer the term Looks because, in film lighting, we often craft specific ambiances like a Day look or a Night look.
NOTE
When a Look is recorded, Blackout stores the current parameter values of your fixtures at that moment.
Groups and Favorites are not referenced — they are only tools used to arrive at those values.
Creating a Look
To create a Look simply press Record on the command keypad.
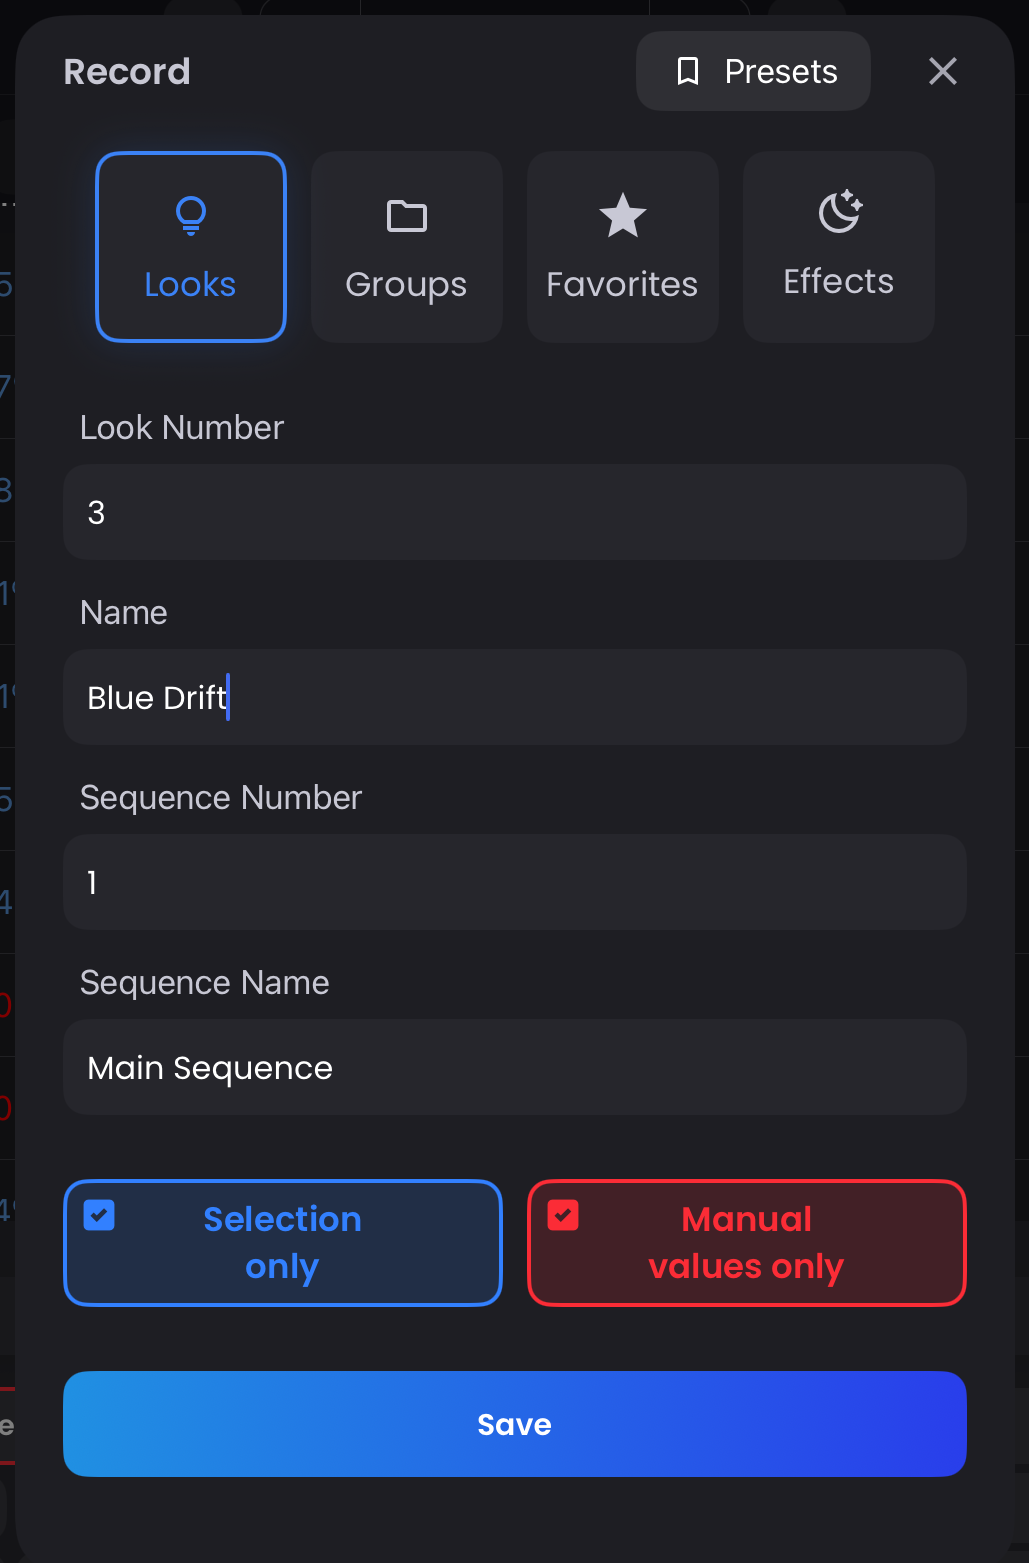
- Look Number - The number assigned to this Look (auto-increments by default)
- Name - Optional label for the Look ie. Day Exterior, Night Interior
- Sequence Number - The Sequence where this Look will be stored (defaults to current Sequence)
- Sequence Name - The name of the destination Sequence
- Selection only – Only the currently selected Fixtures will be stored in the Look. Whether all values or only manual values are stored depends on the Manual values only option
- Manual values only - This option will store just the red values that you manually changed into the destination Look
WARNING
Beware that storing Manual values only into a Look will literally only store the red values and nothing else. If you only changed Color Temperature, only Color Temperature will be stored so if you expect your Tint to be at 0 when you go to this look, you must also make sure your Tint is a red zero (0) along with whatever Color Temperature you chose when storing.
Each Look must live inside a Sequence and is therefore automatically created in 1. Main Sequence if not specified.
Playing Looks
To play through your Looks, simply press the play button either at the bottom of the Looks Sidebar, or at the top center in the Header Playback Section. This will advance you to the next Look in your selected Sequence.
If you want to play your Looks out of order, you can simply press the play button next to the Look of your choice in the Sidebar. Jump to a Look by tapping the name of the Look in the list.
TIP
The play button functions as a traditional Go command, advancing playback based on your current Sequence.
Look Colors
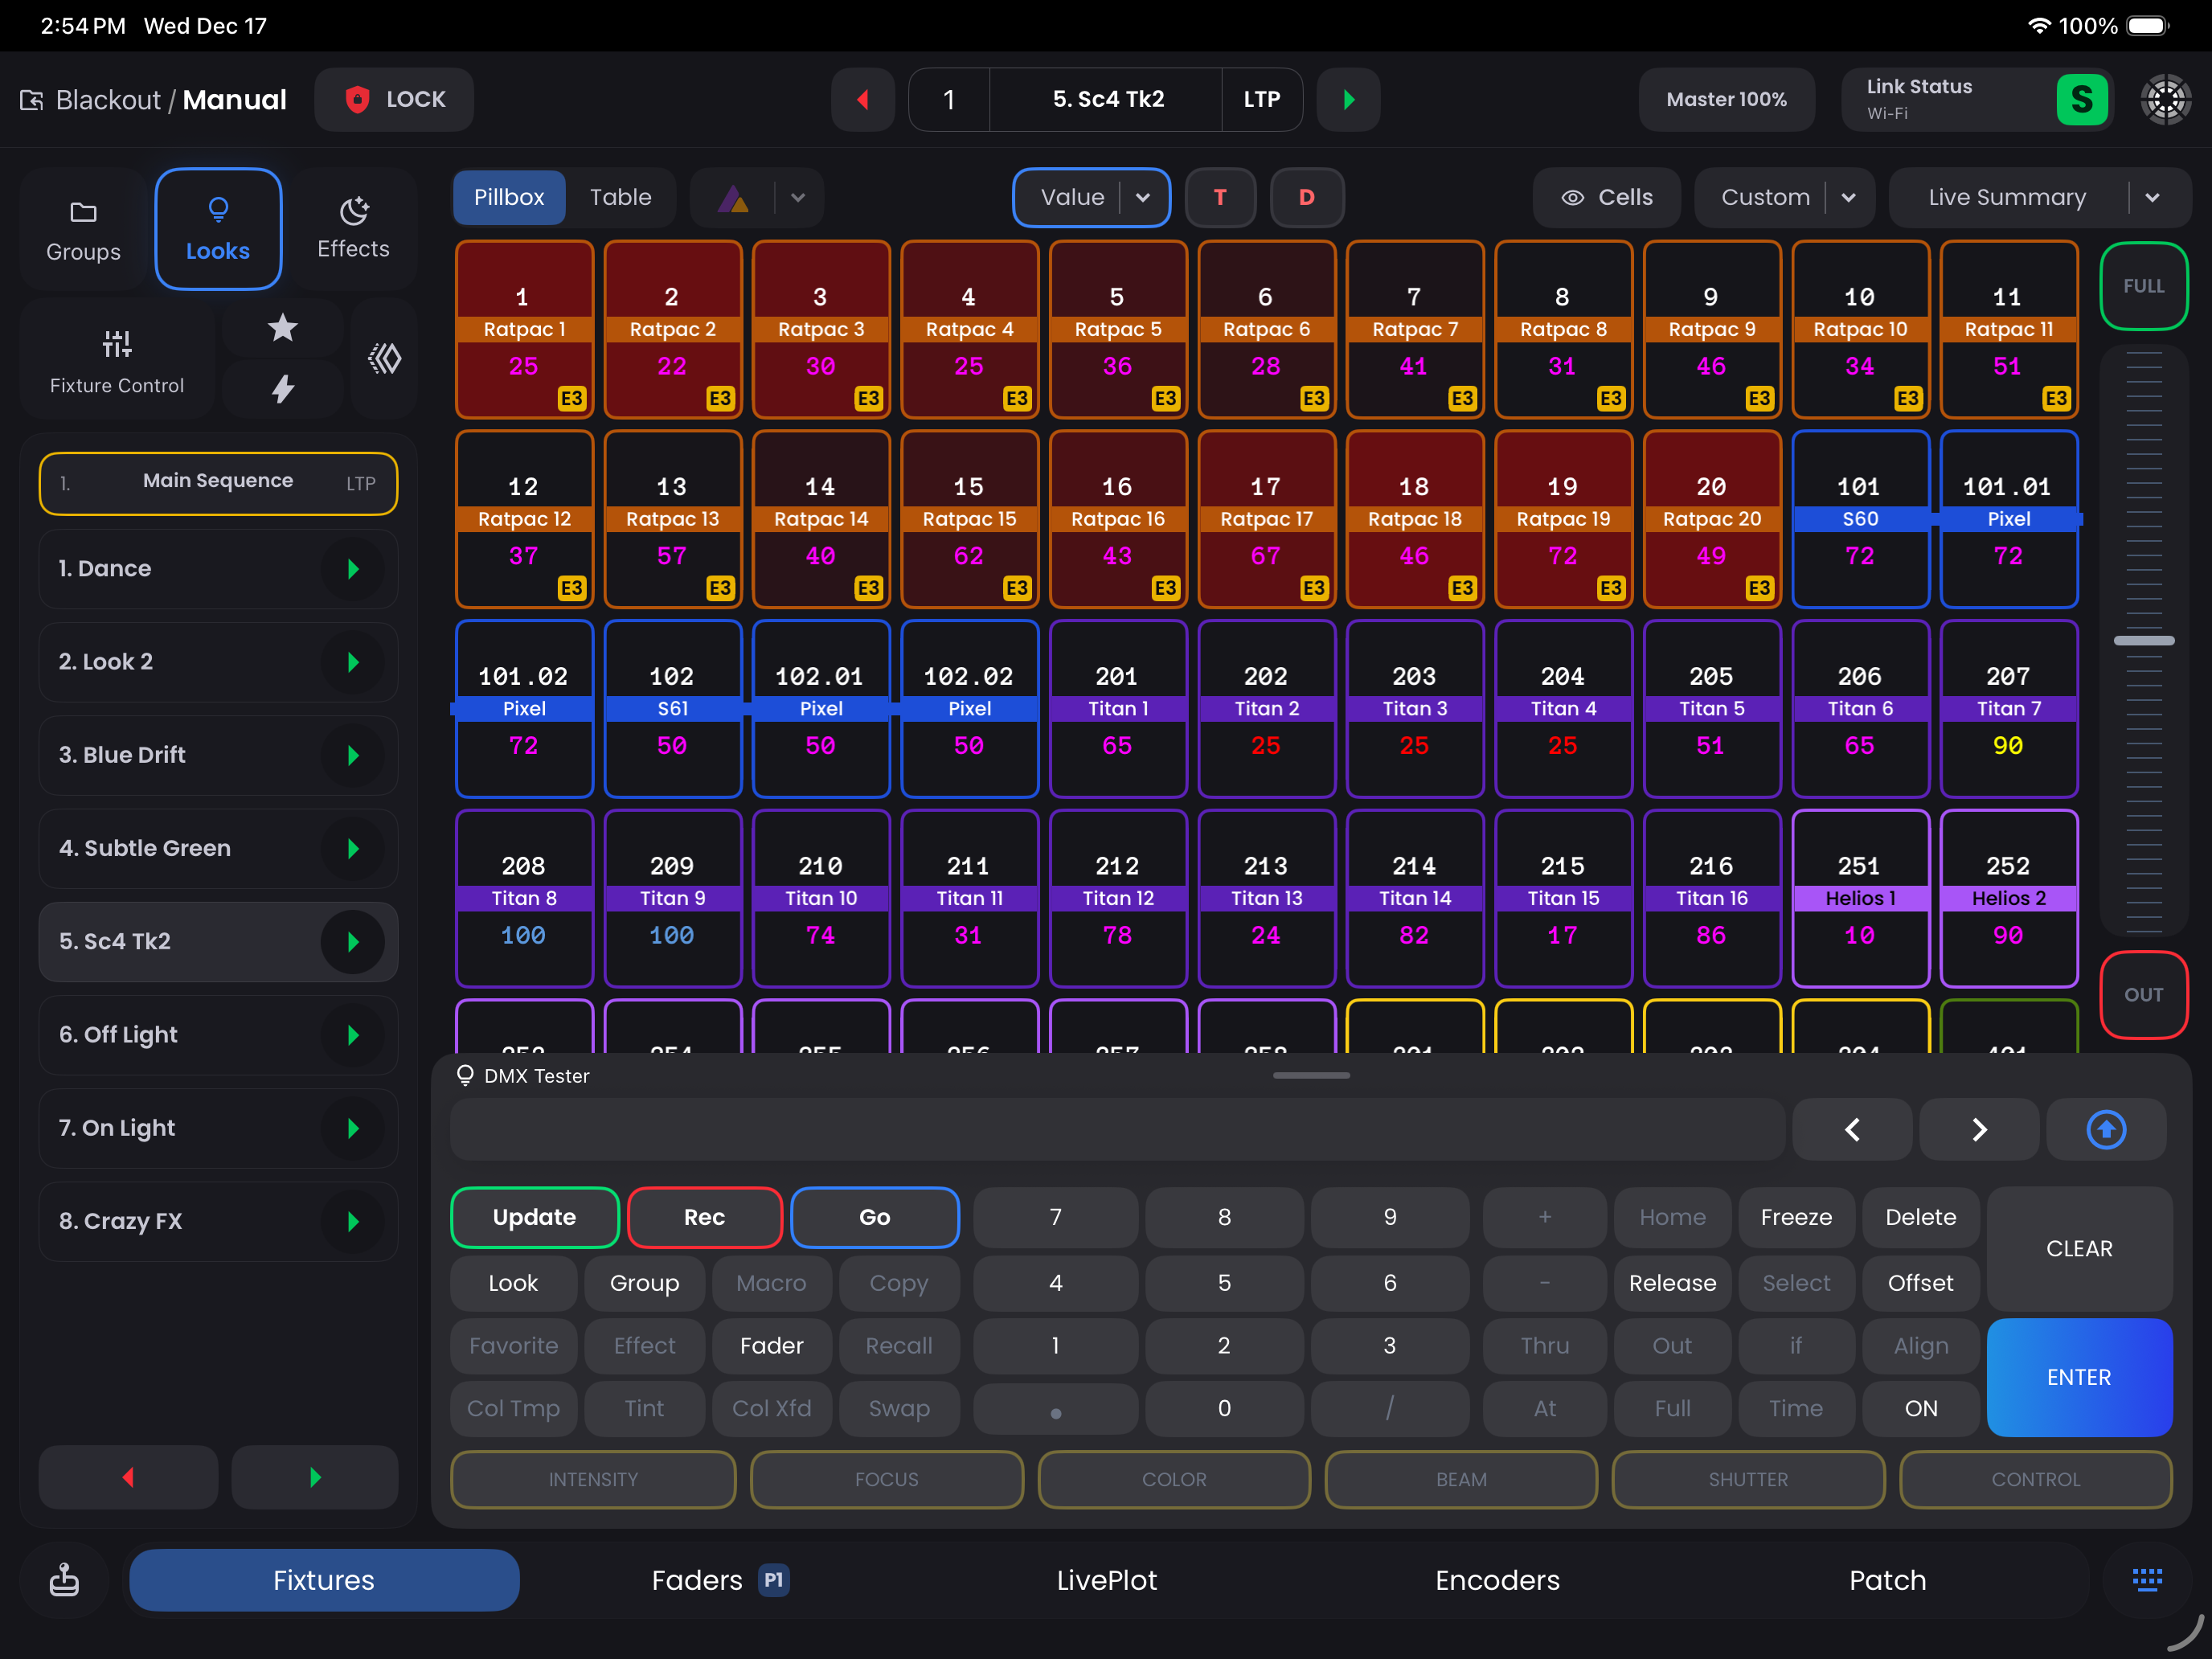
As you play through your Looks, you will notice that the values in Pillbox View or Table View for every parameter of your lights change colors. This is the basics of tracking and we do this to easily show you what changes from Look to Look.
- White: The value is saved in this Look, there are no previous Look values to compare This usually means it's the first Look
- Purple: The value has not changed from the previous Look
- Green: The value has gone DOWN from the previous Look Think of the grass, it's green and it's below you. The value has gone DOWN
- Blue: The value has gone UP from the previous Look Think of the sky, it's blue and it's above you. The value has gone UP
- Yellow: The value is coming from another Fader outside of the Sequence/Fader you are currently in
Updating a Look
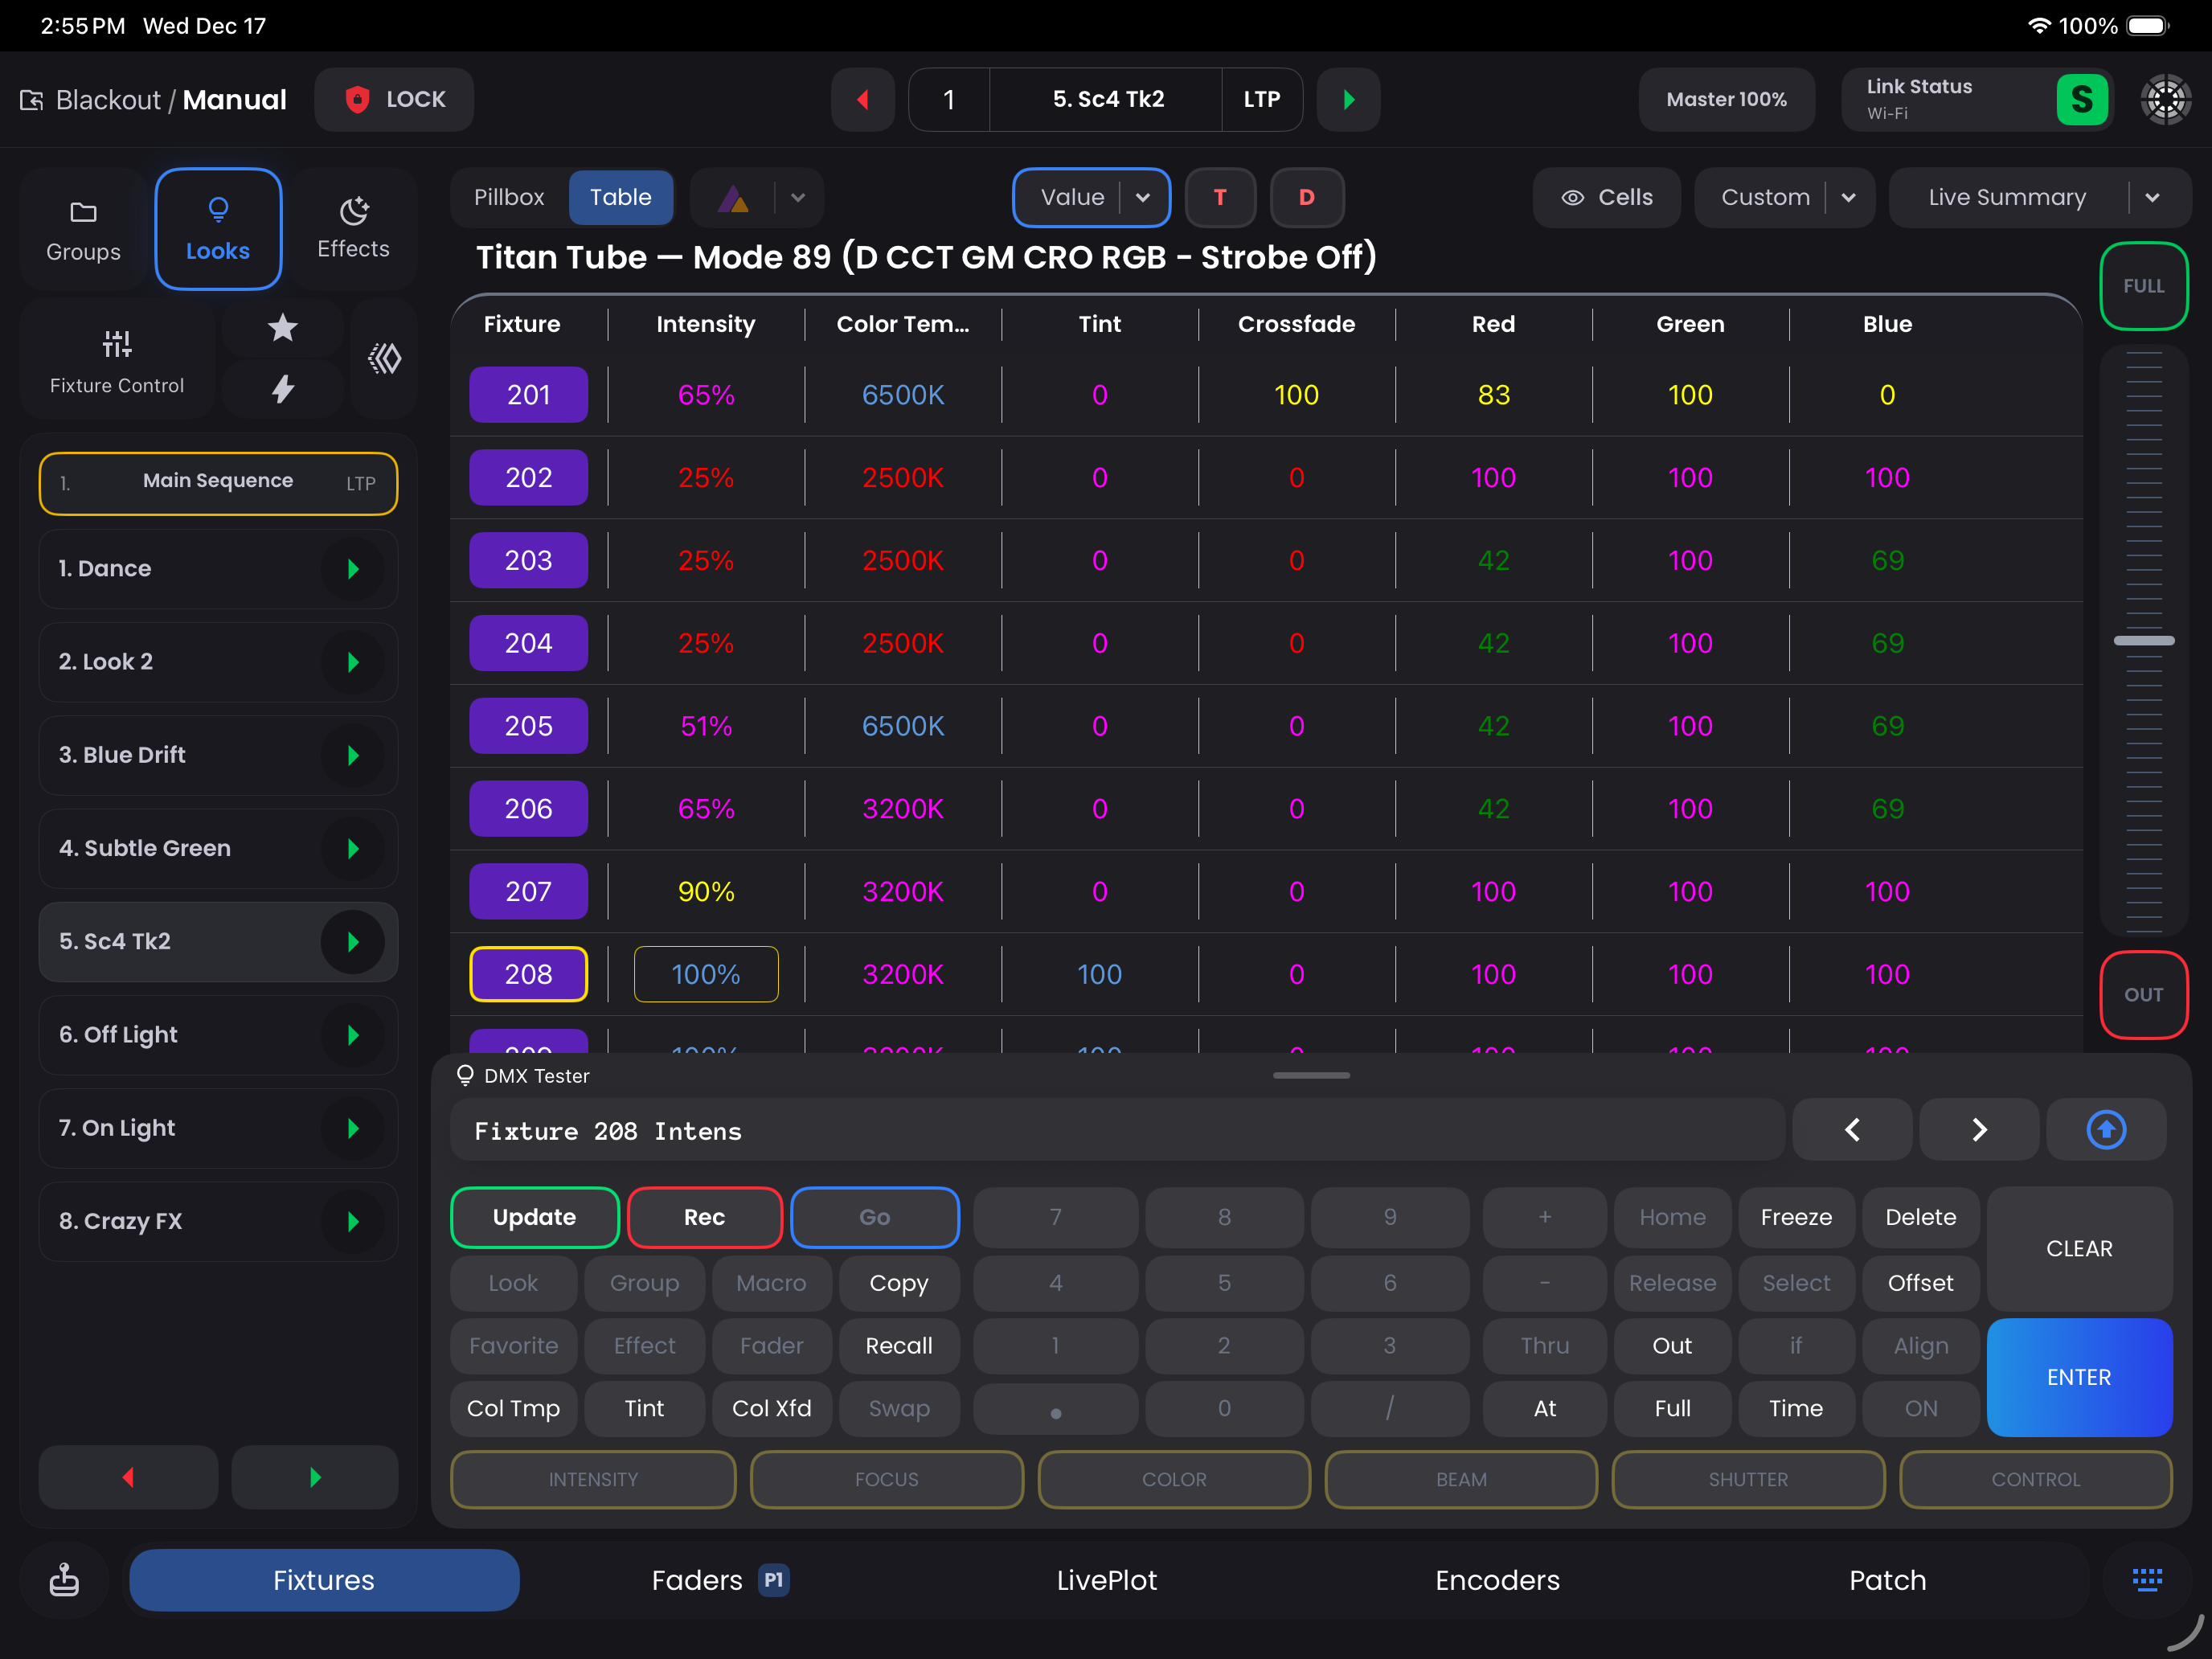
To update a Look, make the changes you want on your lights. Any changes will show up as red values in the Pillbox or Table View. Press Update. By default, the Current Look is selected along with Manual values only. If you tap Save, all red values will update the current look.
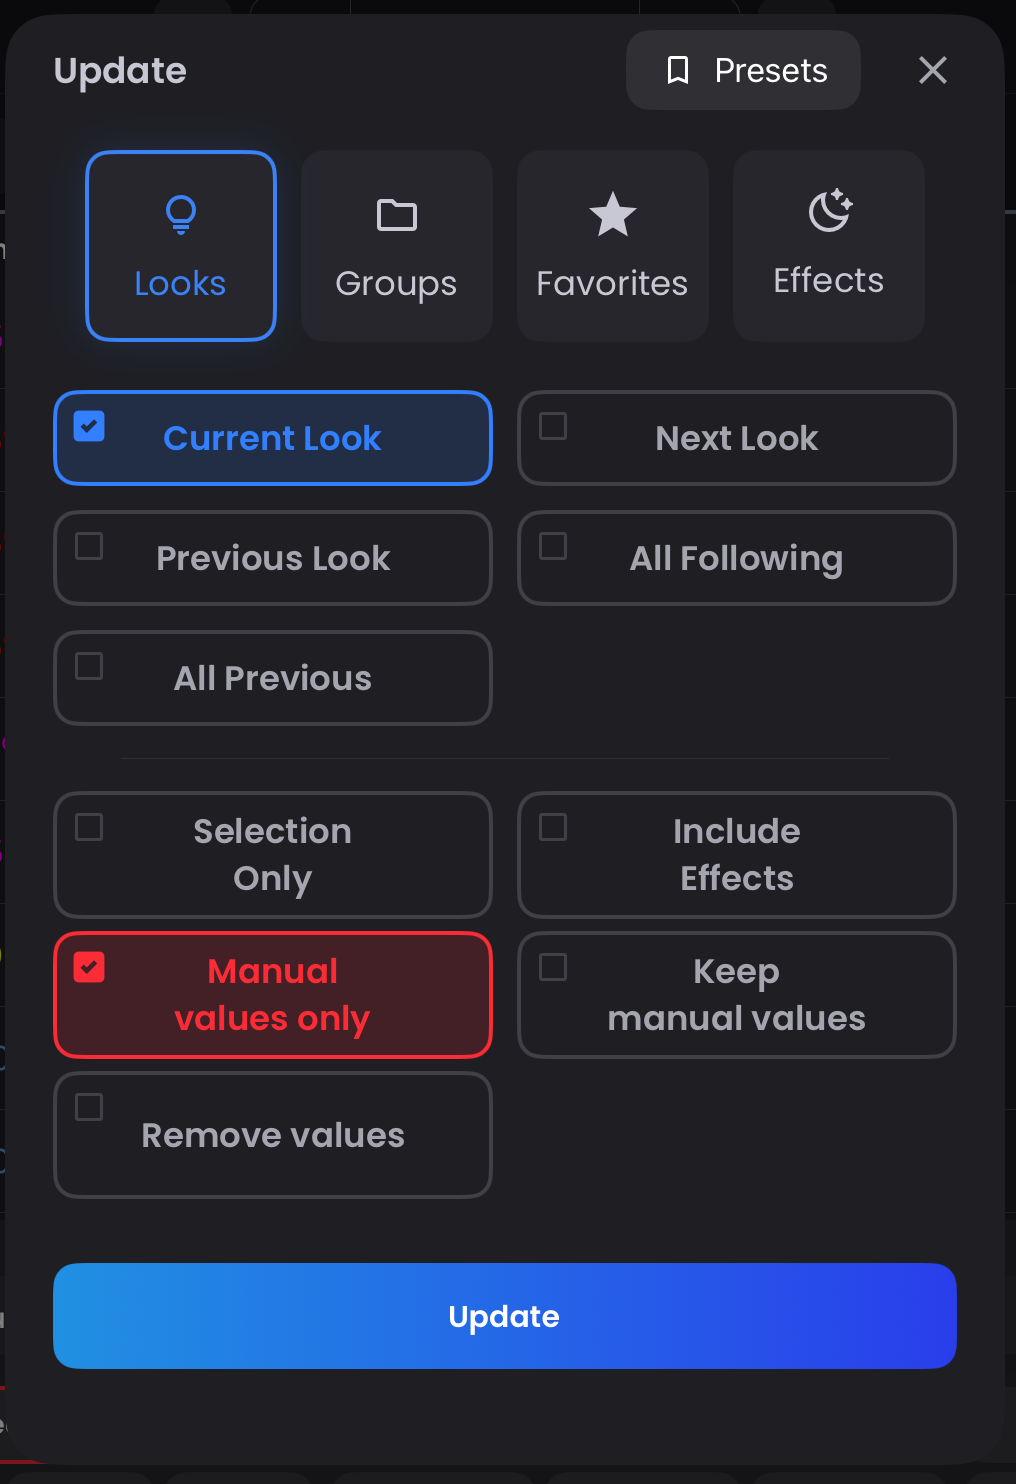
Destination Options:
- Current Look - This will update the current Look you are in
- Next Look - This updates the following Look
- Previous Look - This updates the previous Look
- All Following - This updates the following Look(s) in your current Sequence
- All Previous - This updates the previous Look(s) in your current Sequence
Update Options:
- Selection Only - This will update from your currently selected Fixtures
- Include Effects - When enabled, any Effects currently running will be stored in the Look
- Manual Values Only (default) - This will update only the red values in the Pillbox or Table View. By unchecking this, you are updating all values on the board or all values in your selection - this can include values coming in from Faders that are not Excluded from Record
- Keep manual values - Preserves red values after updating so you can continue recording ie. Saving a Favorite immediately after updating a Look
- Remove values - Removes parameter values from the destination Look that match your current selection/manual values
Managing Looks
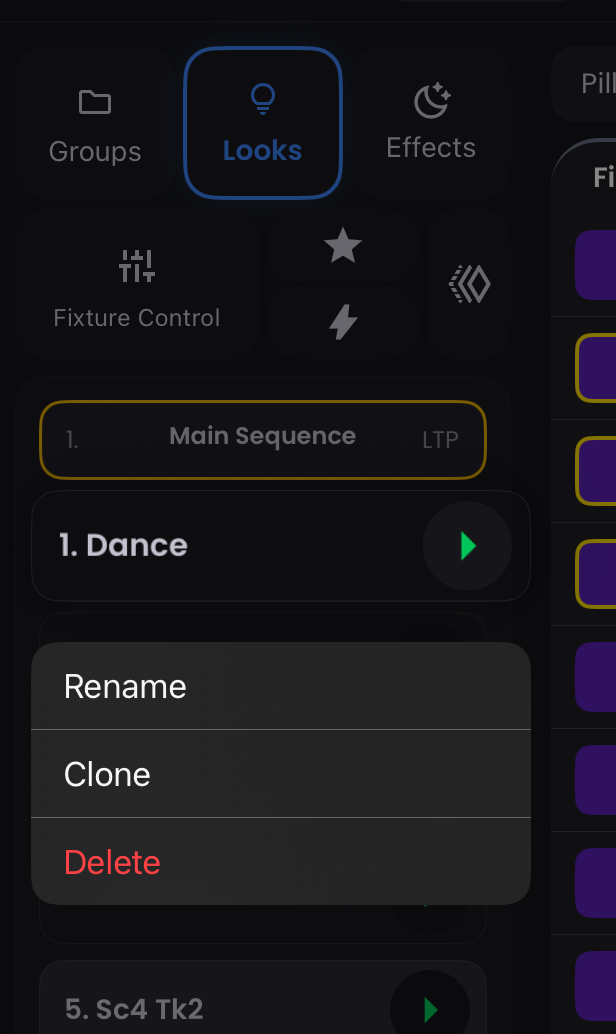
You can rename, clone, or delete a Look by long-pressing on the Look in the Sidebar.
Looks Expanded
When you double-tap Looks or swipe it right in the Sidebar, you enter Looks Expanded. Here is a much more detailed set of timing controls for you to edit. As with any spreadsheet, you can edit by tapping in any field and typing.
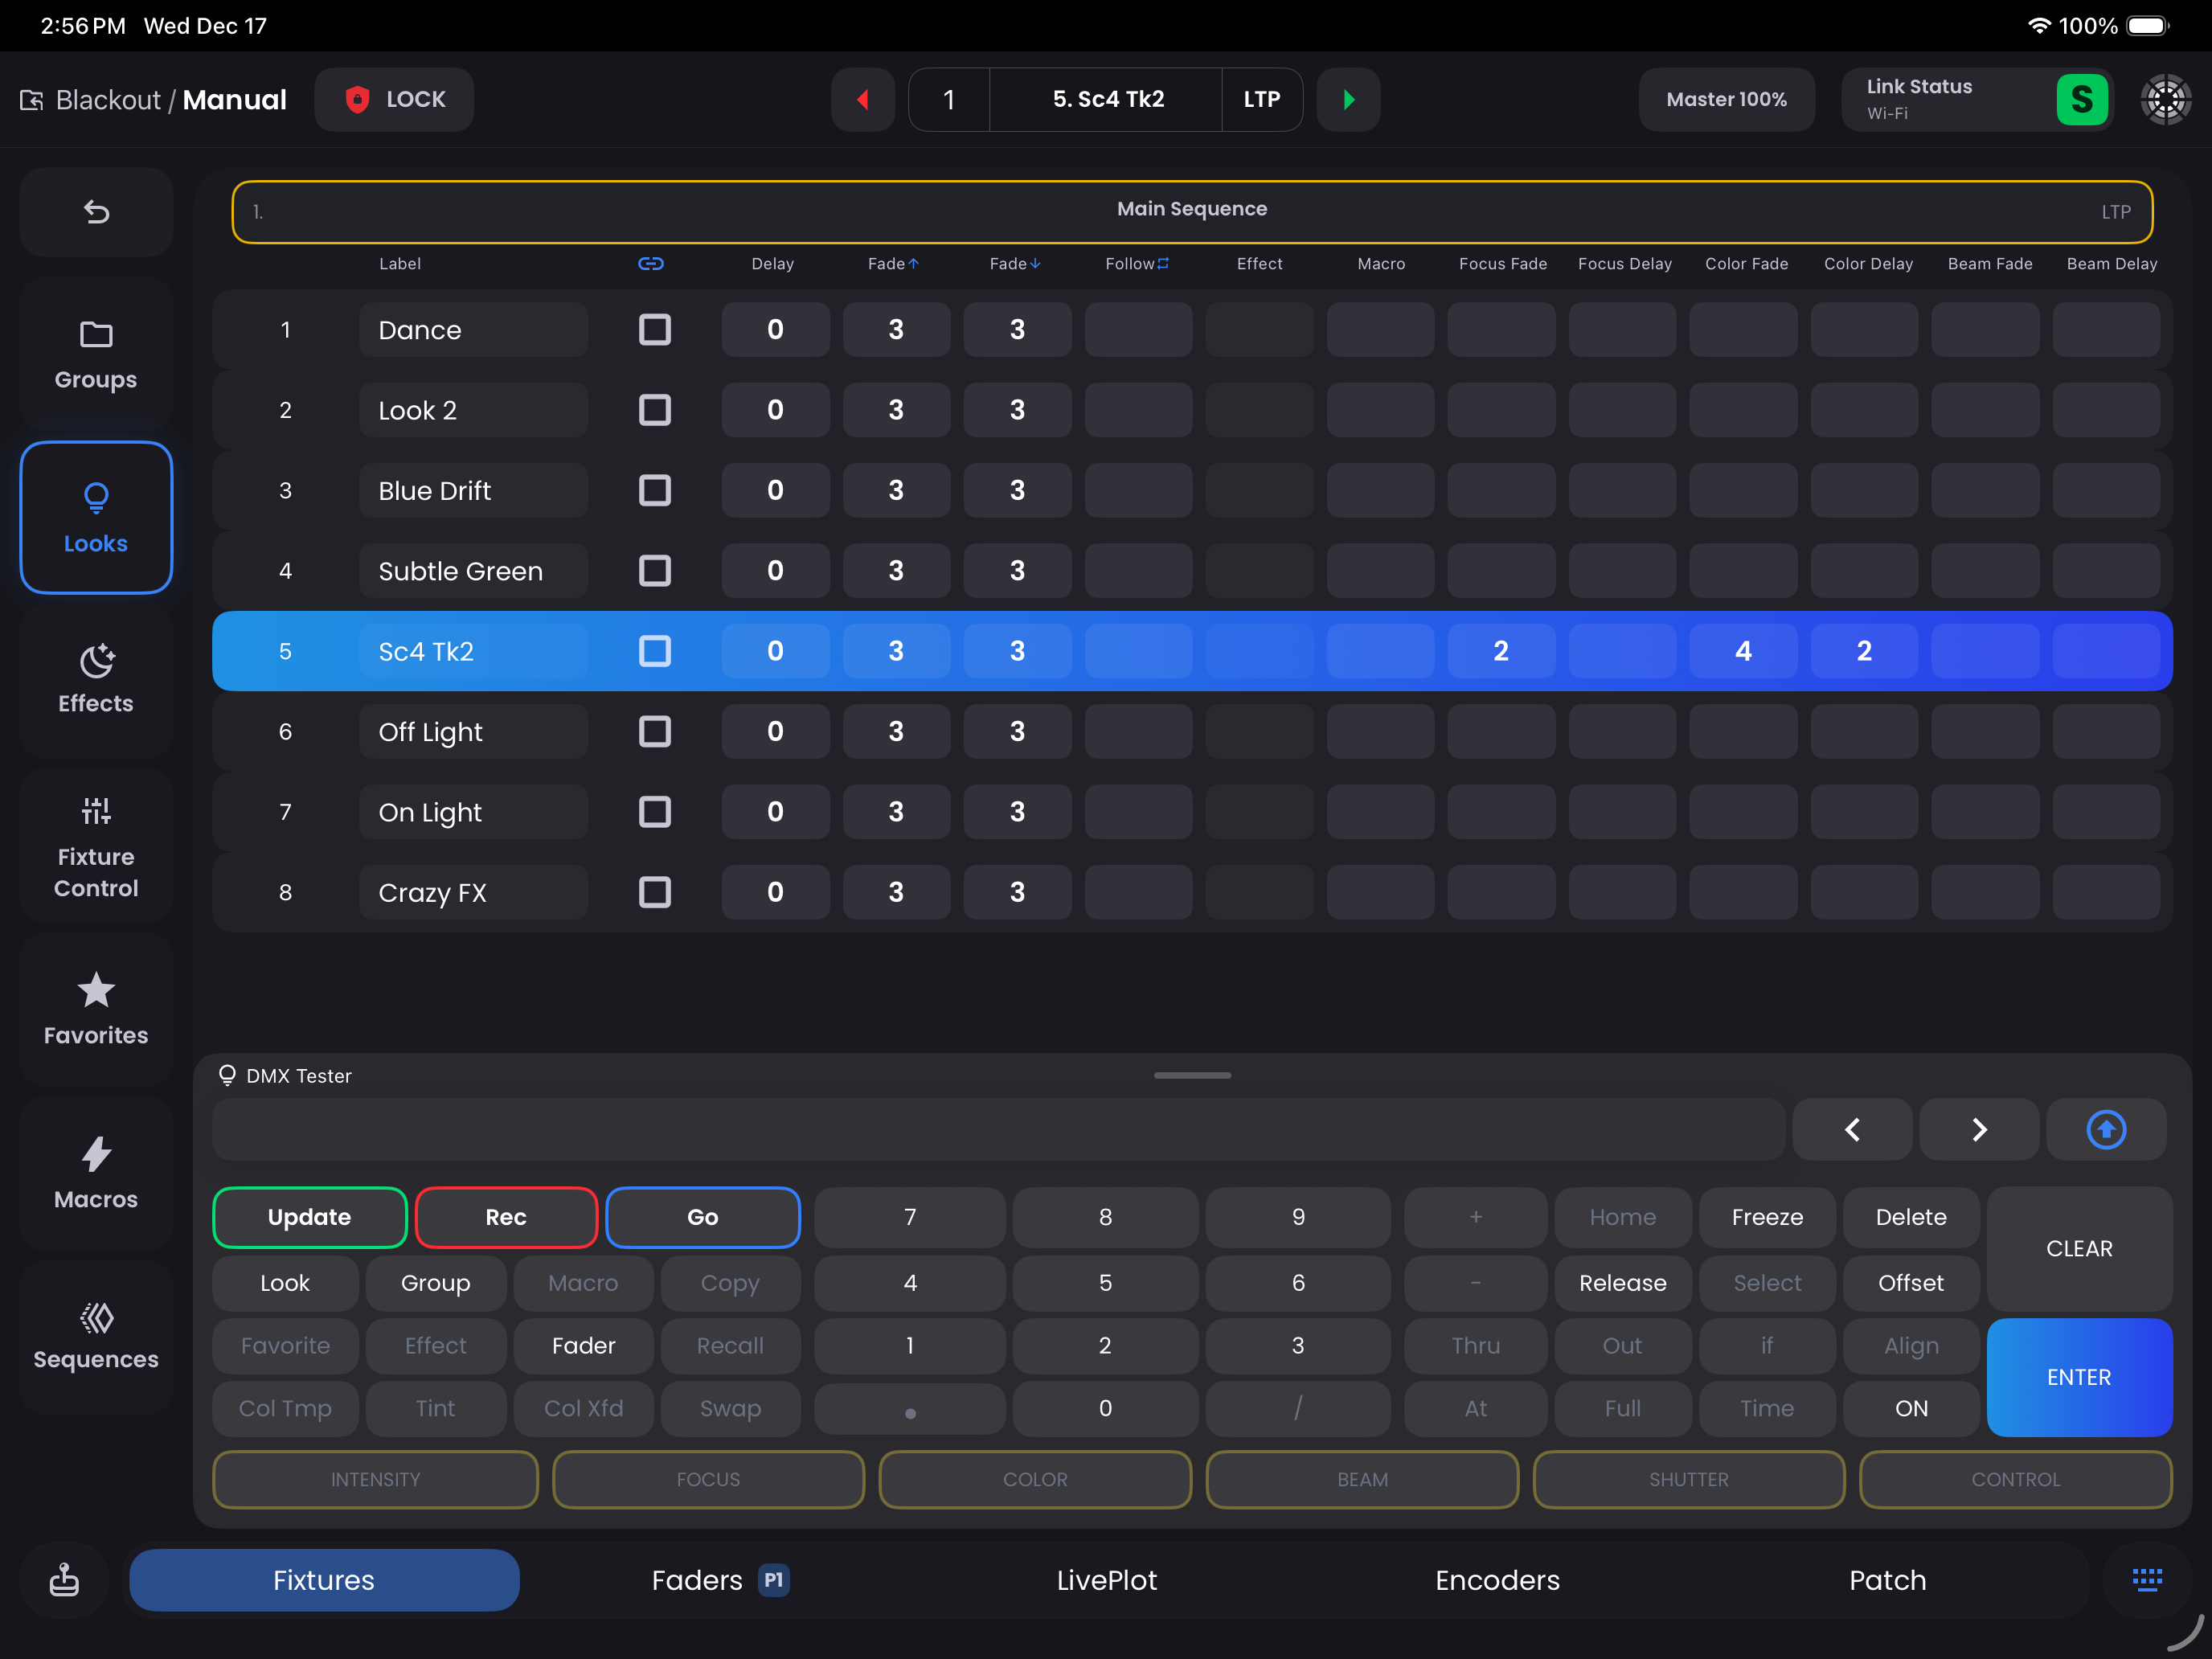
- Number: Look Number. This cannot be edited here.
- Label: Where the label you assigned to your Look is displayed.
- 🔗 (Link): Checking this will play this Look automatically after the previous Look ends. Note that the previous Look could be somewhere else in the Sequence, not necessarily directly before.
- Delay: Delays the start of the Look by x seconds.
- Fade ↑: Fade Time for Fixtures with Intensity values going up in the Look including all NIPs (non-Intensity parameters)
- Fade ↓: Fade Time for Fixtures with Intensity values going down in the Look including all NIPs (non-Intensity parameters)
- Follow: Assign a Look number for non-linear playback. Example: Look 4 Follow 2. If you are in Look 4 and tap Go, you transition to Look 2.
- Effect: When you record an Effect into a Look, the Effect number is displayed here. This cannot be edited here.
- Macro: Not yet implemented.
- Focus Fade: Parameters in the Focus Category take this Fade Time.
- Focus Delay: Parameters in the Focus Category take this Delay Time.
- Color Fade: Parameters in the Color Category take this Fade Time.
- Color Delay: Parameters in the Color Category take this Delay Time.
- Beam Fade: Parameters in the Beam Category [along with Shutter/Control Categories] take this Fade Time.
- Beam Delay: Parameters in the Beam Category [along with Shutter/Control Categories] take this Delay Time.
TIP
If you want to add individual fade or delay timings to Fixture(s) you can with a time command. This would override the global look timings for those Fixture(s)