Patch Screen
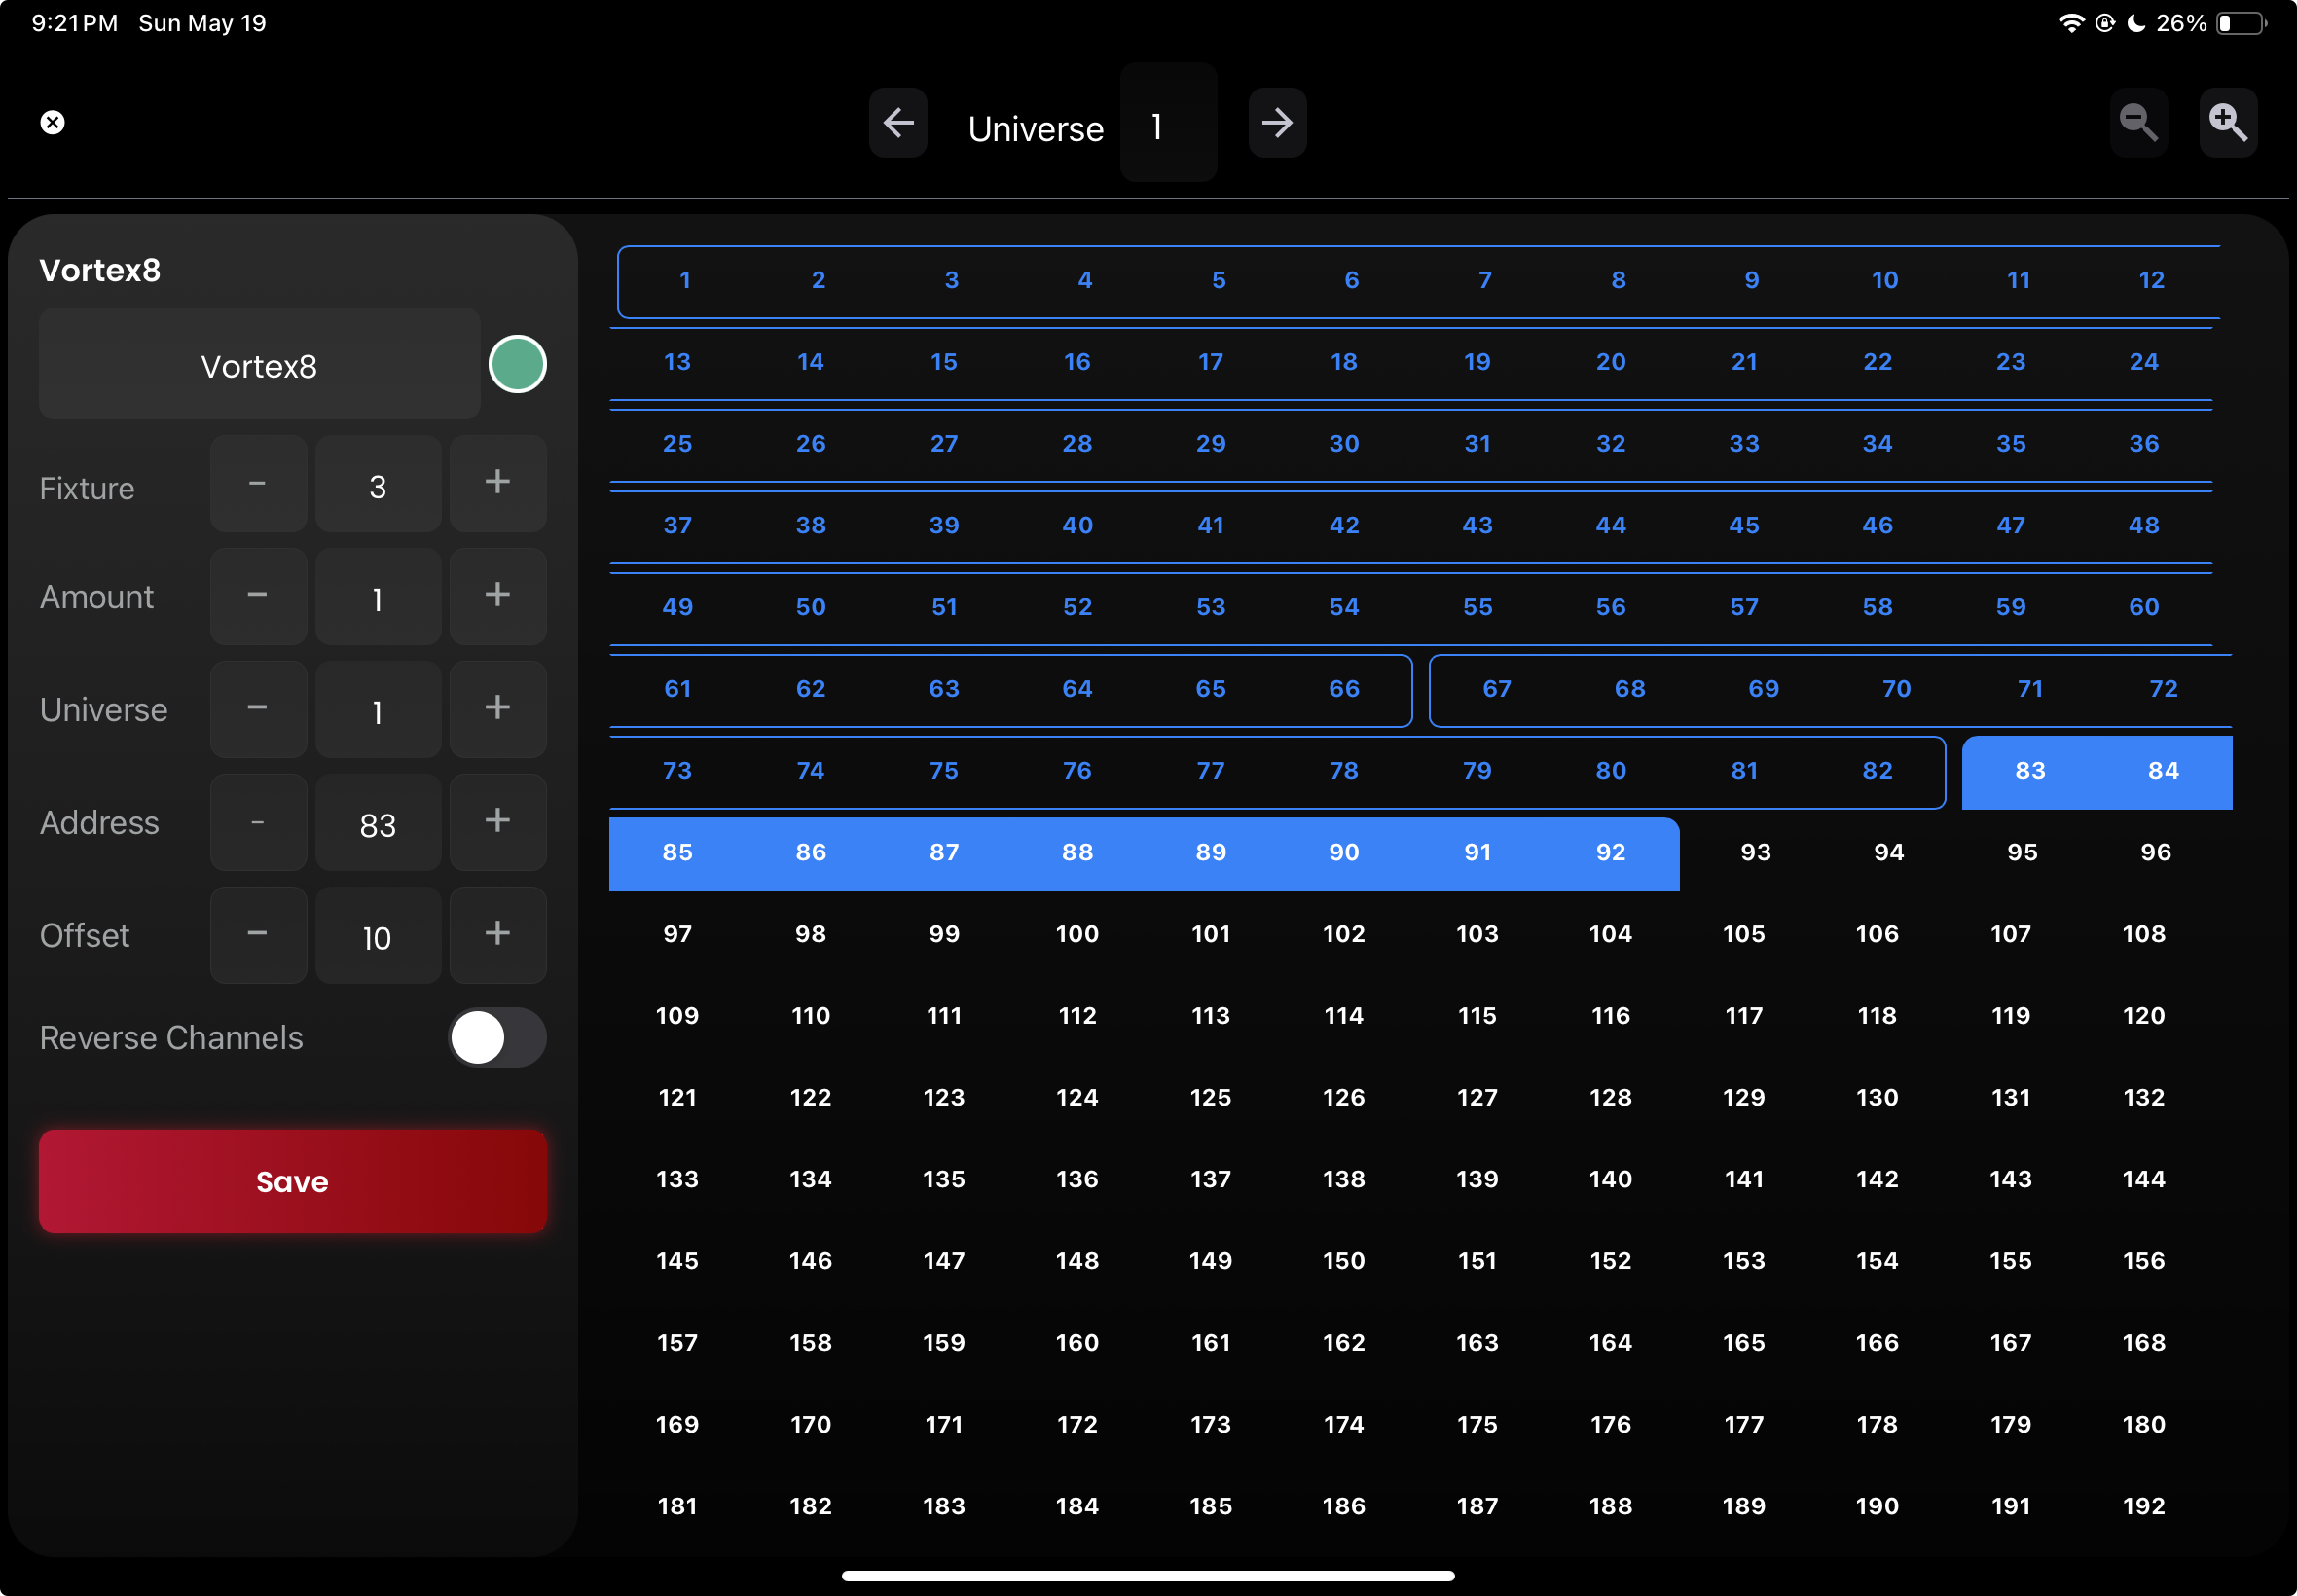
After tapping the Patch (#) button next to your chosen Fixture profile, a popup appears where you assign the Fixture an address so that Blackout understands where to send the correct information.

Left Sidebar
Left Sidebar
- Label & Color - Name your Fixture(s) which will show up in the center of the Pillbox in Fixtures. On the right is a seafoam green circle. Tap that to change the color of the Pillbox outline.
- Fixture - Choose your Fixture starting number here. This is the identifier you will select with.
- Amount - You can easily patch multiple Fixtures by specifying the amount here.
- Universe - This is the actual universe you are sending on. Blackout will automatically wrap into the next universe if needed.
- Address - This is the actual starting address for your patch.
- Offset - Here you can set an offset, or gap, between the patched Fixtures. This will default to the footprint of the profile so they are sequential, without a gap.
- Reverse Channels - This toggle allows you to reverse the patch in case your crew accidentally laid your lights in backwards.
Before Reversing:
| After Reversing:
|
TIP
Offset is a great tool. Did your Data team choose to space the addressing of your Titans by 10 when the profile takes 8? Choose Offset 10 and you’re good to go.
Visual Layout

The right-hand side of the screen shows a visual layout of all patched Fixtures in the selected universe. It dynamically updates as you change the form on the left sidebar. You can simply tap an address to set a new starting address for the patch.
TIP
A general rule of thumb: Use a new 100-level for each fixture type, for example:
- Skypanels - Fix 101-105
- Astera Titan Tubes - Fix 201-208
- Kino Freestyles - Fix 301-303
- etc.
When you are happy with your decisions, tap Save to add your lights to your Location.
