Effects
Effects let you create dynamic, animated lighting sequences that play over your Fixtures. You can build virtually any Effect you can think of with Blackout's Advanced Effects Engine—from simple chases to complex, layered animations.
WARNING
Blackout does not allow Effects over Bluetooth as Bluetooth is significantly slower of a protocol than Art-Net or sACN.
INFO
Blackout generates real-time Effects for your lights. Depending on what mode they are in, this can cause unexpected results if you are not fully aware of how the profile works. For best results, avoid putting your lights in any "gel, effect, or ultimate modes."
Creating an Effect
NOTE
The order in which you select your fixtures is important as that will be the order in which the Effect is played.
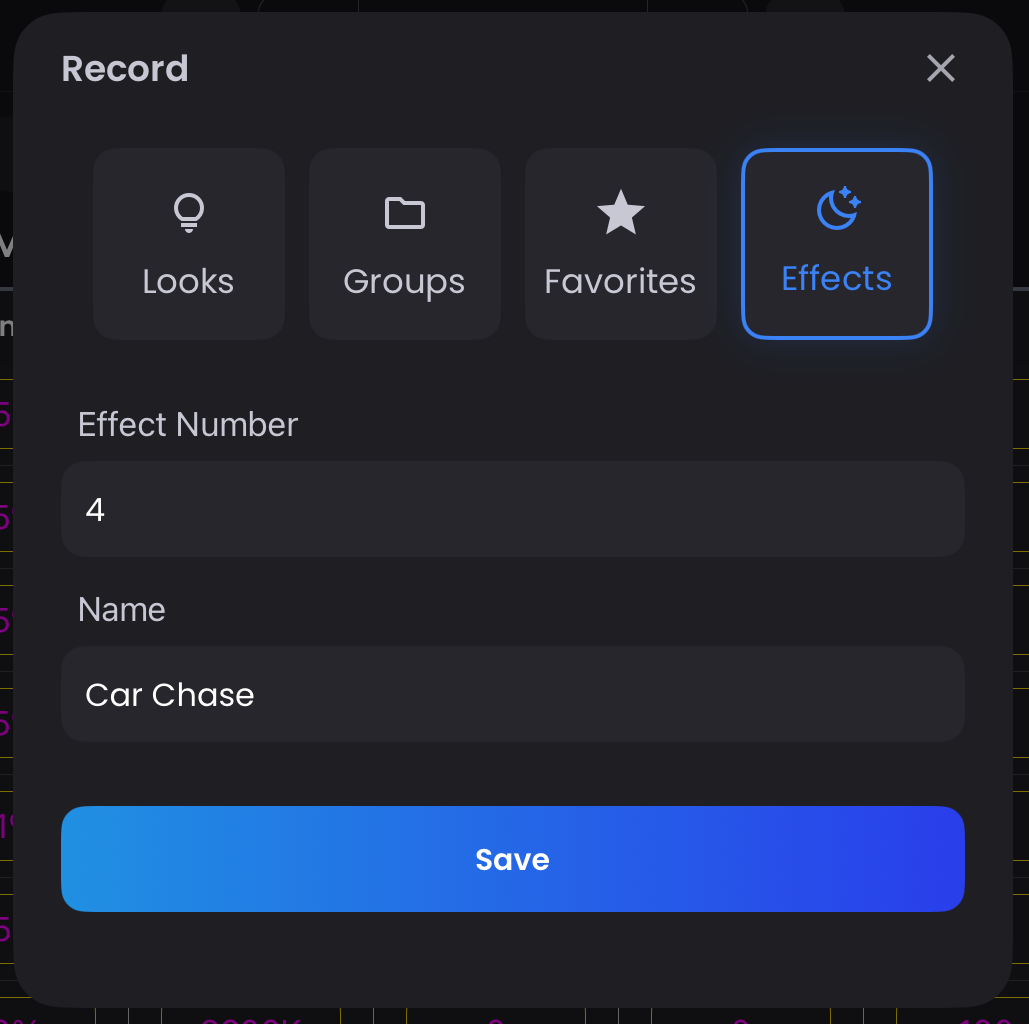
To create an Effect:
- Select your Fixtures or a Group in the order you want the Effect to play
- Press Record on the command keypad
- Navigate to the Effects tab
- Name and Number your Effect
- Tap
Save
Groups and Effects
If you select a single Group and record an Effect, the Effect will reference the Group directly. This means you can easily modify the Group later, and the Effect will update accordingly.
This is not the case if you select multiple Groups or individual Fixtures.
Playing an Effect
Play the Effect using the Play, Pause, or Stop buttons on the Effect in the Sidebar or in Effects Expanded.
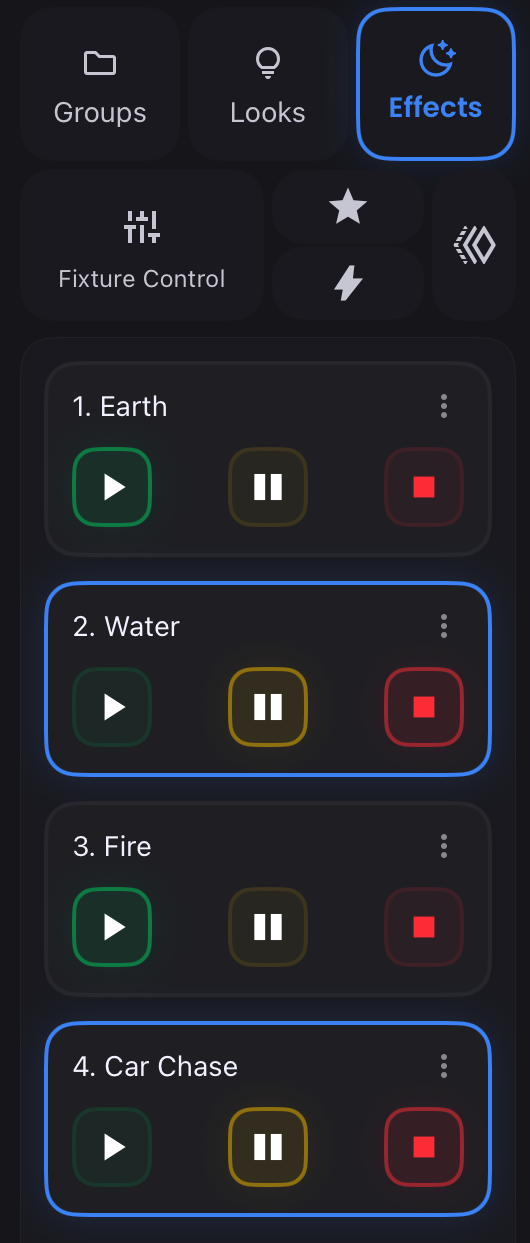
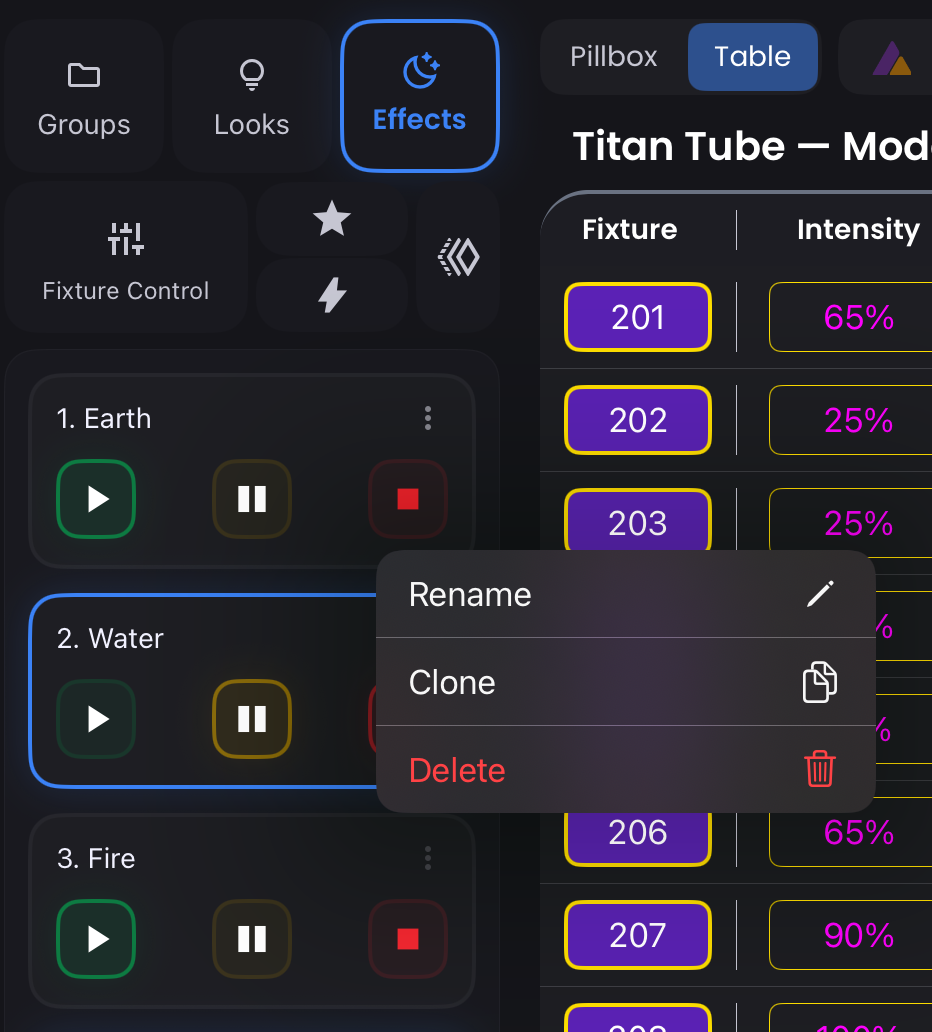
Managing Effects
You can rename, clone, or delete a Effect by tapping on the three-dots (more_vert) on the Effect in the Sidebar.
Effects Expanded
Double-tap the Effects tab or swipe it right to open Effects Expanded.
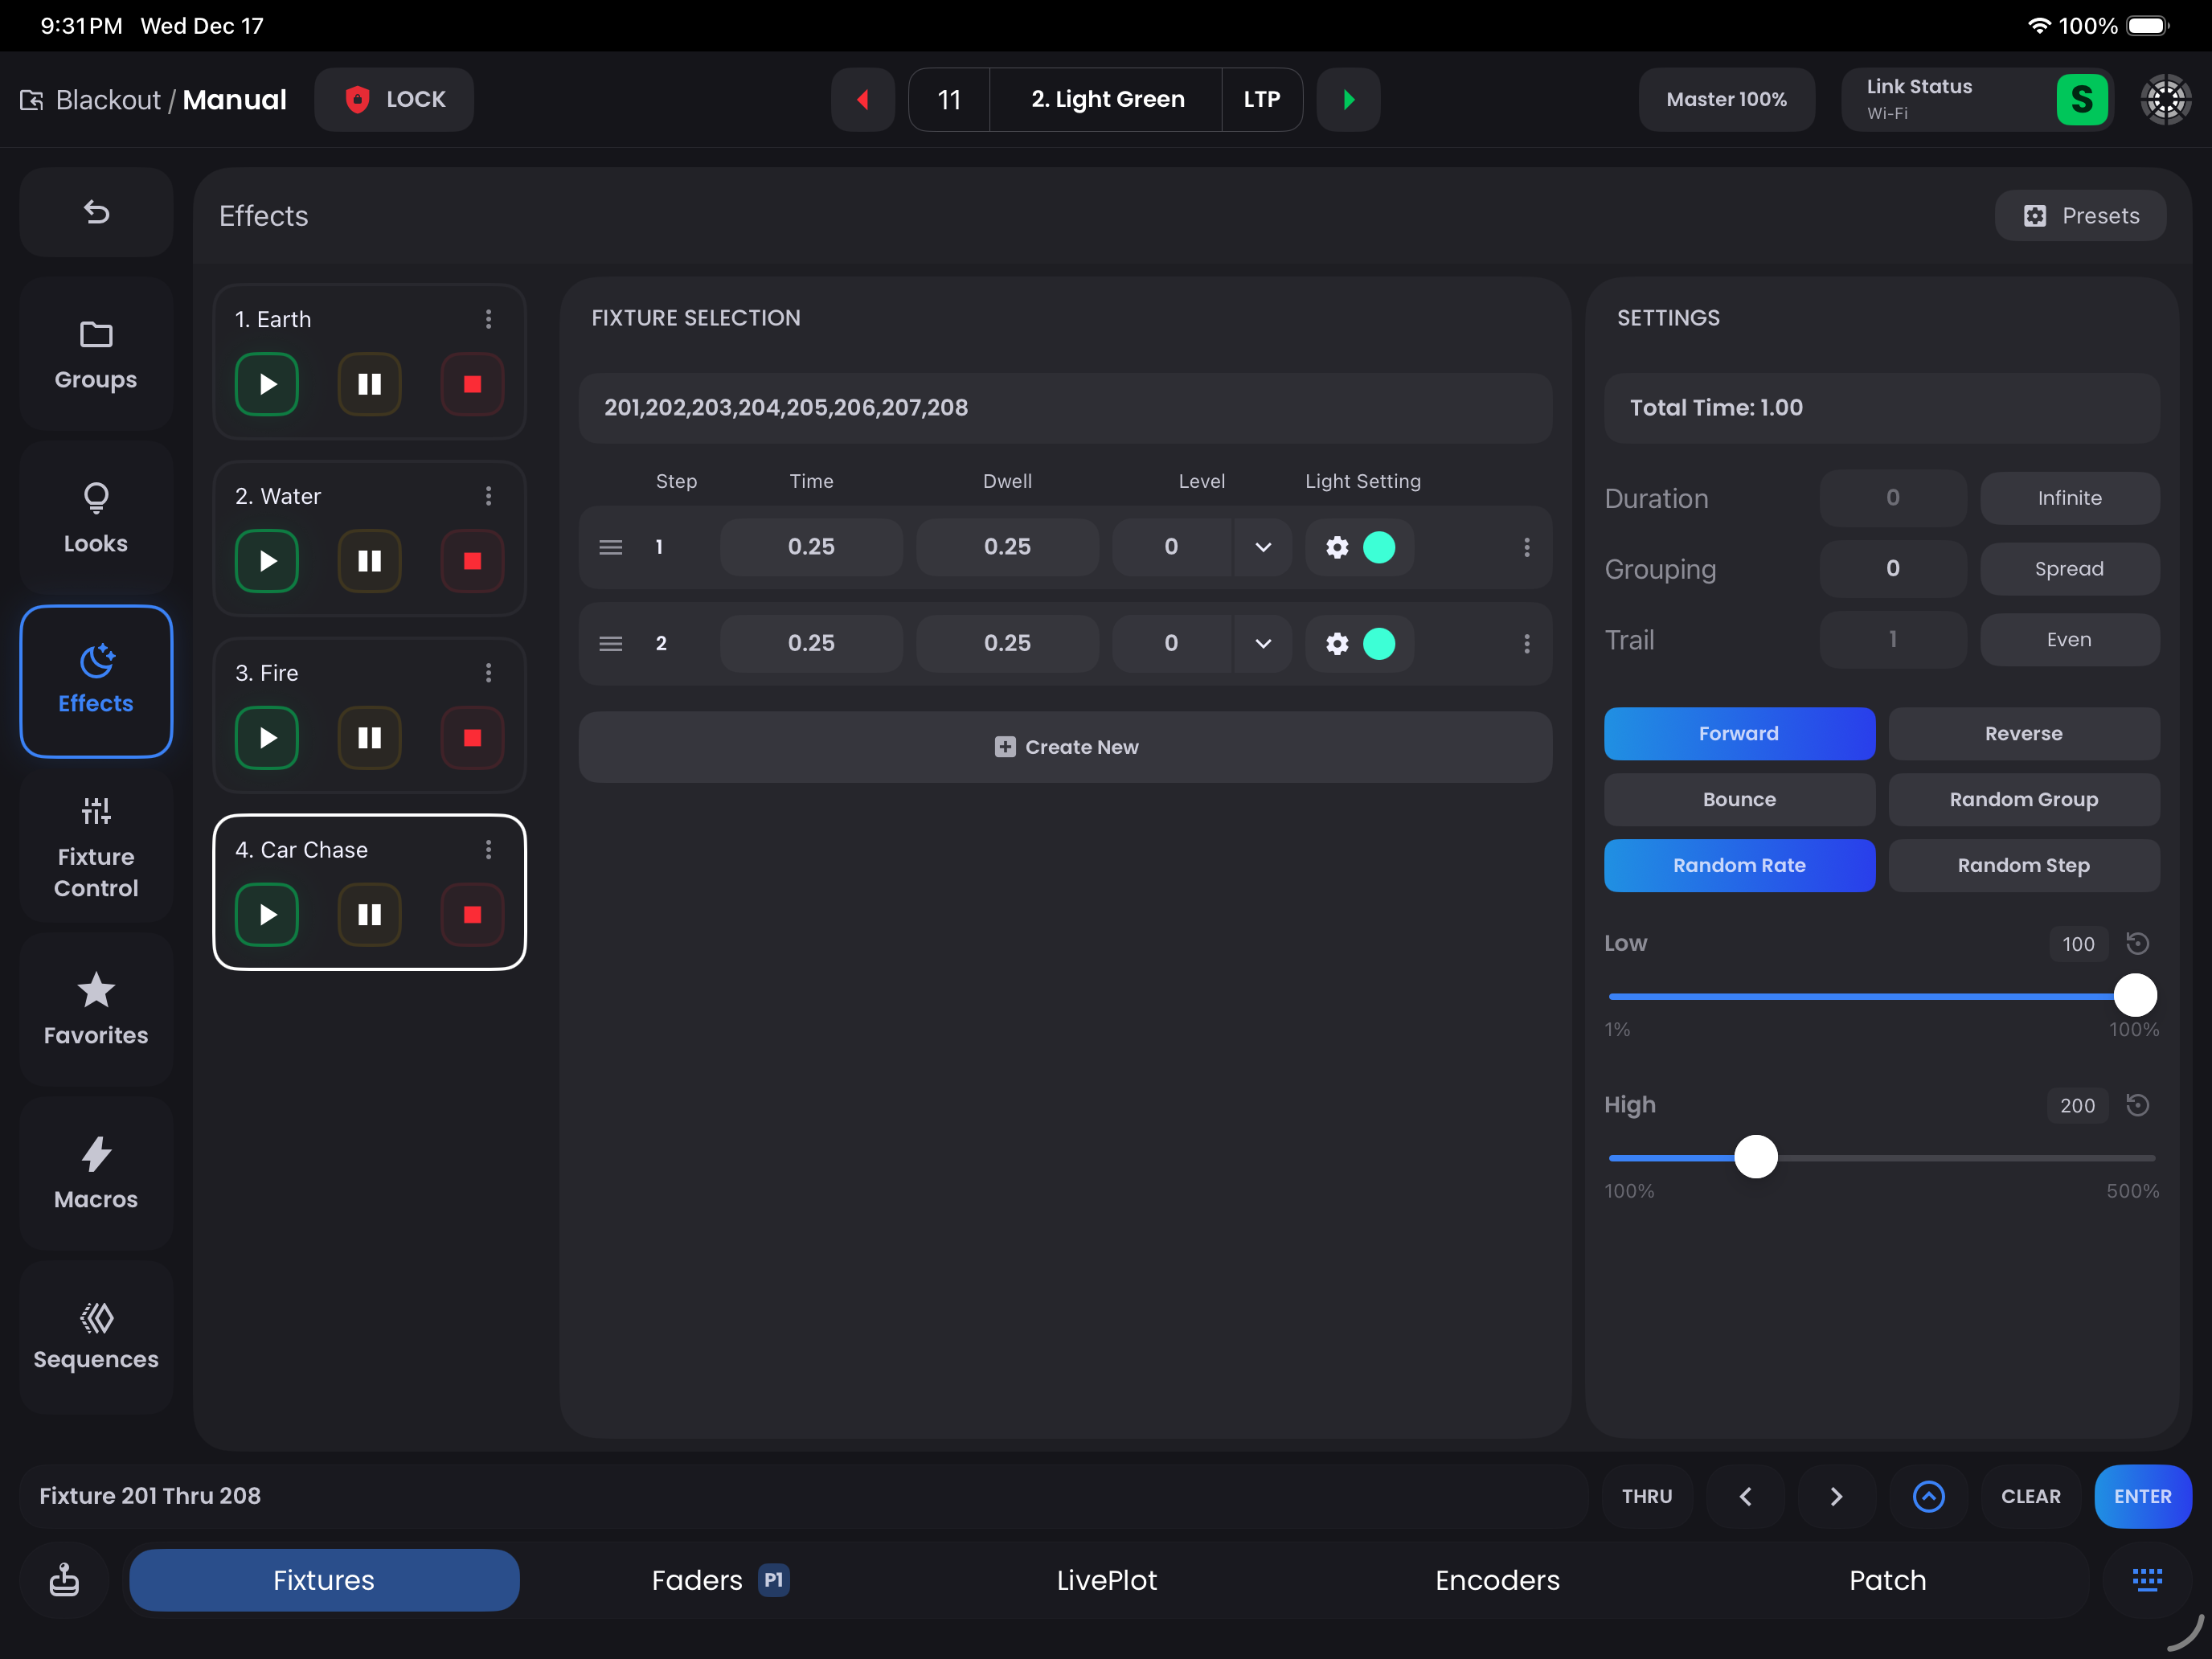
In this view, you can see:
- The Fixtures the Effect will play over
- All of the steps that make up the Effect (steps play in order)
- Effect settings and timing controls
Effect Steps
Step - The Effect Step number. Effects play in step order
Time - How long it takes to reach the Level and Light Setting for this step
Dwell - How long to stay at that Level and Light Setting before moving to the next step
WARNING
An Effect Step cannot have a total step time (Time + Dwell) = 0. You must set a value ≥ .1 in either the Time field or Dwell field for the Effect Step to trigger properly.
Level - Quick way to set the intensity level for this step. Tap the dropdown to select from:
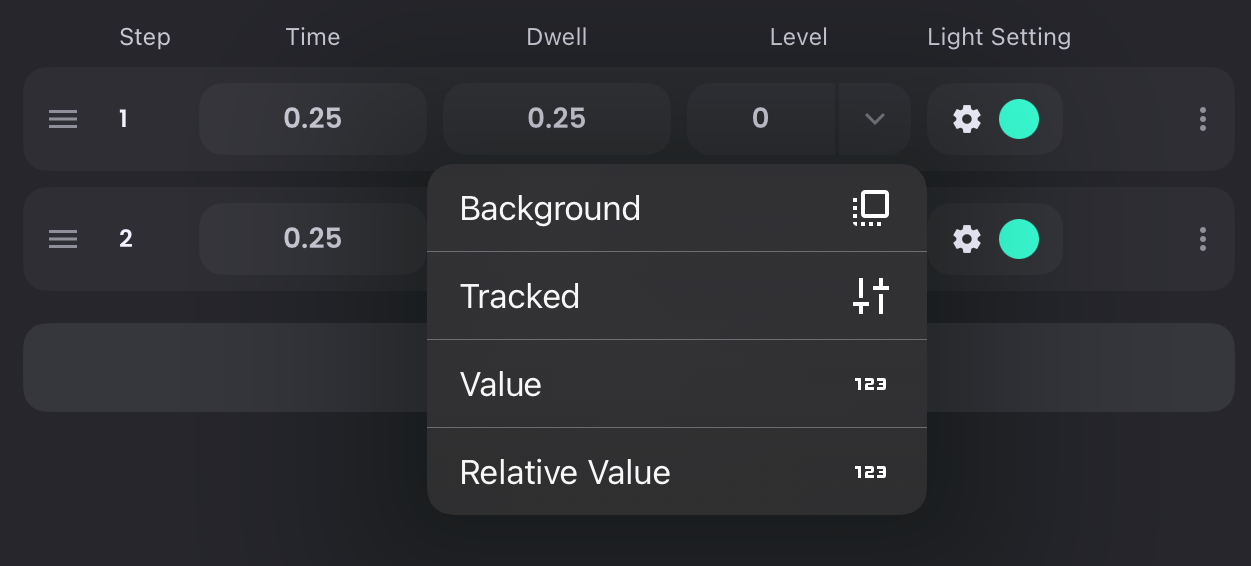
- Background - Adheres to whatever the Fixtures are currently doing without the Effect playing. This is particularly useful when you want to change the Effect on the fly. If you set an Effect to go from Background to 100%, it will play from 0-100% in Look 1 (where fixtures are at 0), but from 50-100% in Look 2 (where fixtures are at 50%).
- Tracked - Uses the value from the previous step
- Value - Set a specific intensity value
- Relative Value - Adjust intensity relative to the current value
Light Setting - Adjust other parameters of the Fixture(s) in this step. Tap the swatch to bring up available Fixture parameters.
- (more_vert) - Duplicate or Delete an Effect Step
Configuring Light Setting Parameters
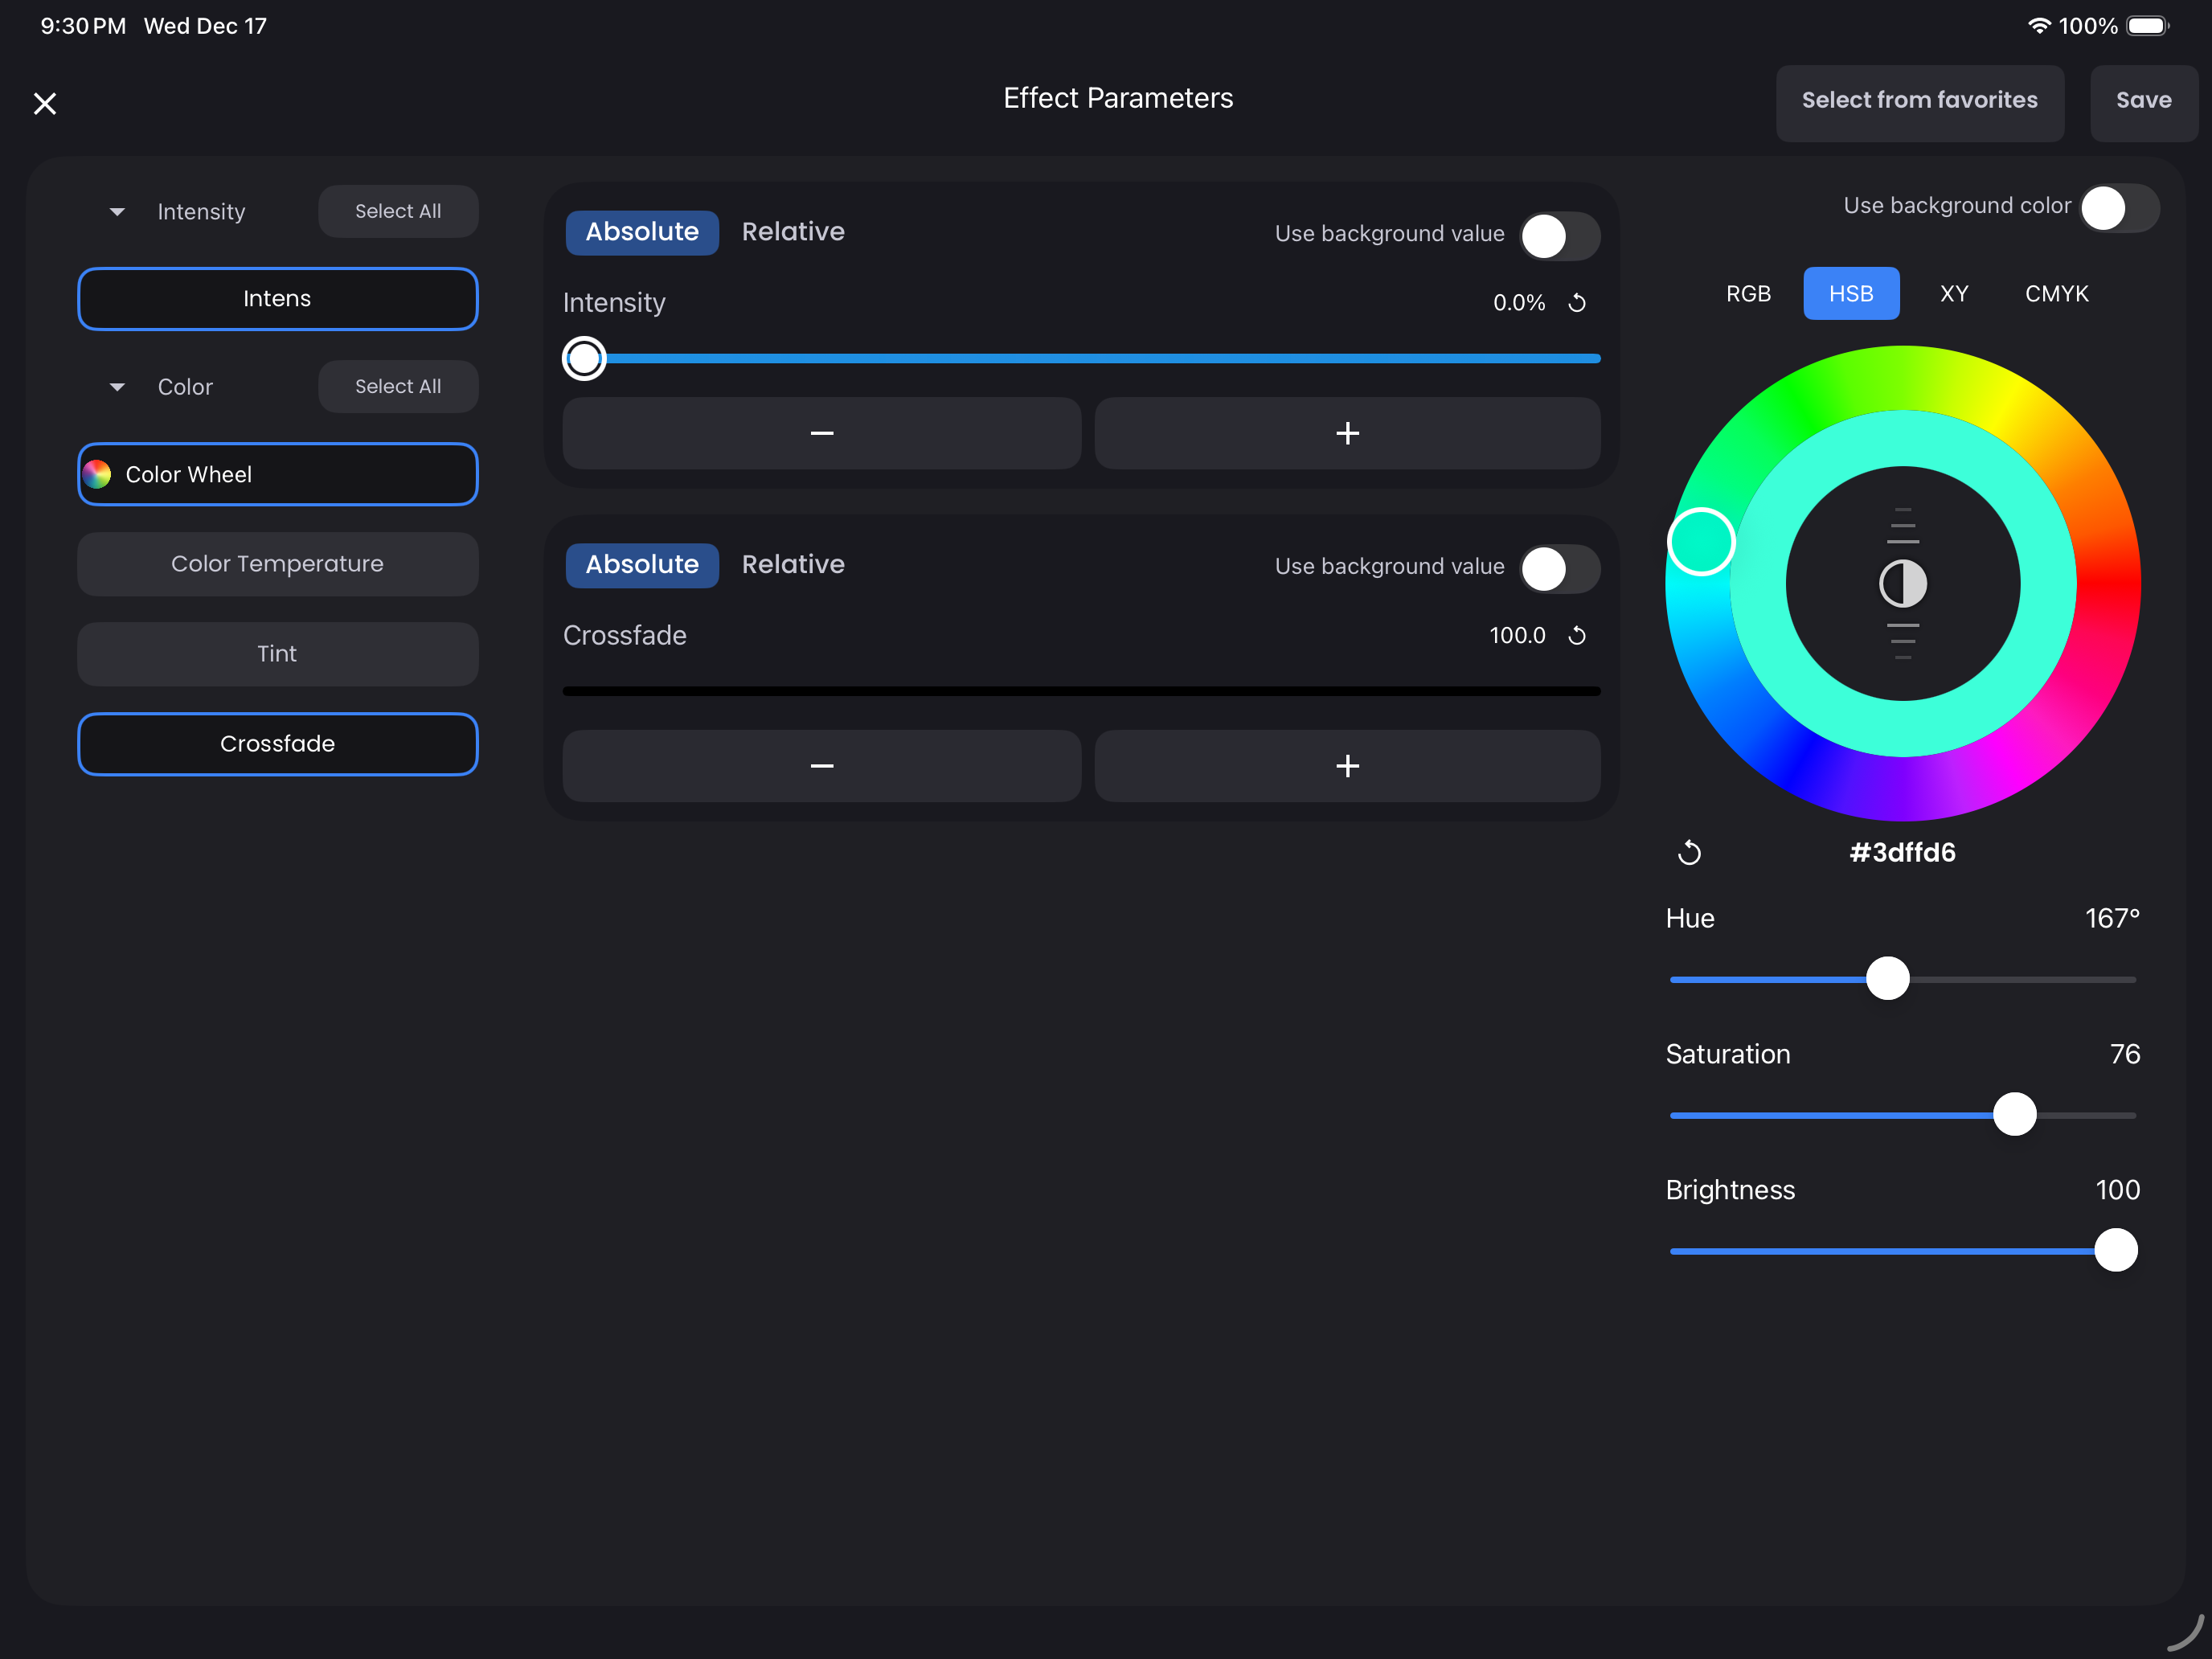
On the left are the available parameters by category. When unselected, the step ignores those parameters. Tap them to make them active—they'll appear on the right side. Every parameter starts as Use background value until you adjust it.
You can easily recall a Favorite by tapping the Select from favorites button in the top right corner. Once you're done, tap Save in the top right.
INFO
The same "Background" concept that applies to Level also works for parameters in Light Setting—they can reference whatever the Fixtures are currently doing.
Effect Settings
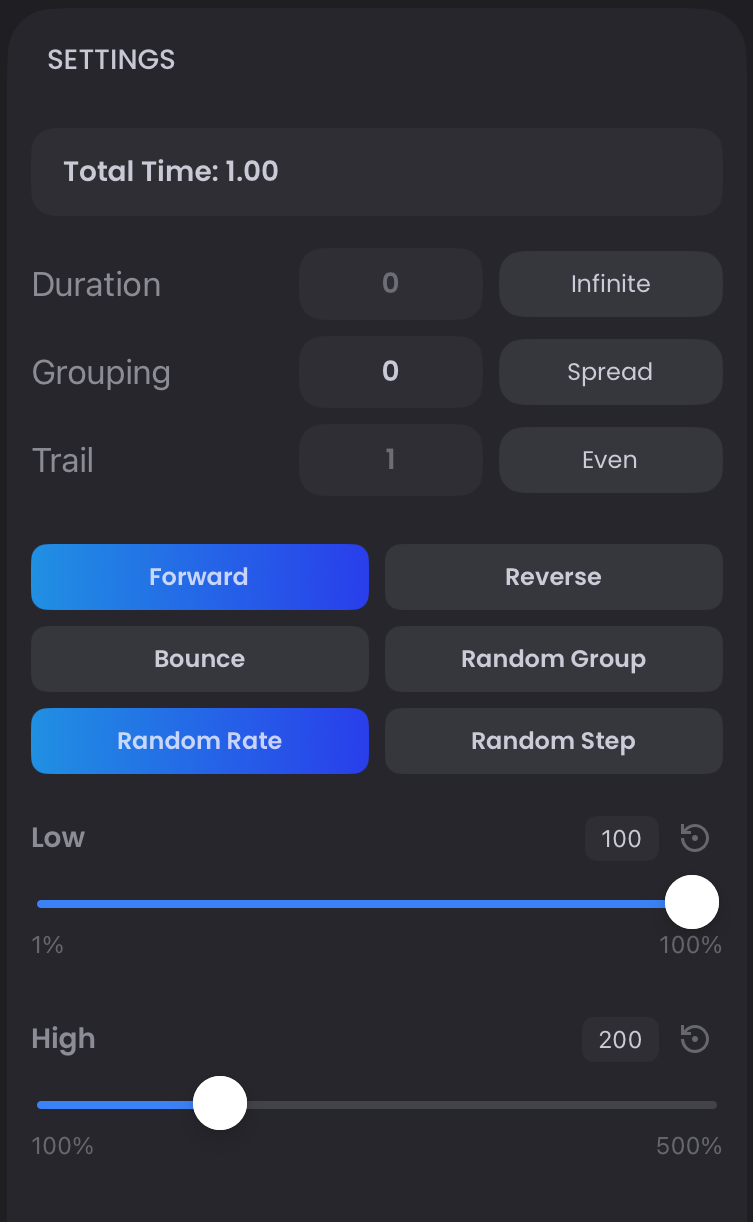
- Total Time - Total time the Effect takes for a light to move through all steps. Adjust this to globally speed up or slow down the Effect
- Duration - Can be set to a time-based duration or a count-based duration
- Grouping - Quickly adjust your Effect to play across symmetrical groups of your Fixtures. These groups would be the same as if you recorded a selection with Interleave using Offset
- Trail - The time between one Fixture ending its last step and the next Fixture starting. Even distributes the selection among the total time, while Solo waits until one Fixture ends completely before the next starts
- Forward - Effect plays forward, in the order of your selection
- Reverse - Effect plays backward, or in reverse order of your selection
- Bounce - Effect plays forward then backward once it hits the last Fixture in your selection
- Random Group - Effect randomizes the grouping to give you a more natural effect
- Random Rate - Effect randomizes the Total Time to be anywhere from 1% to 500% of the current speed. Sliders appear when this option is selected
Effect Presets
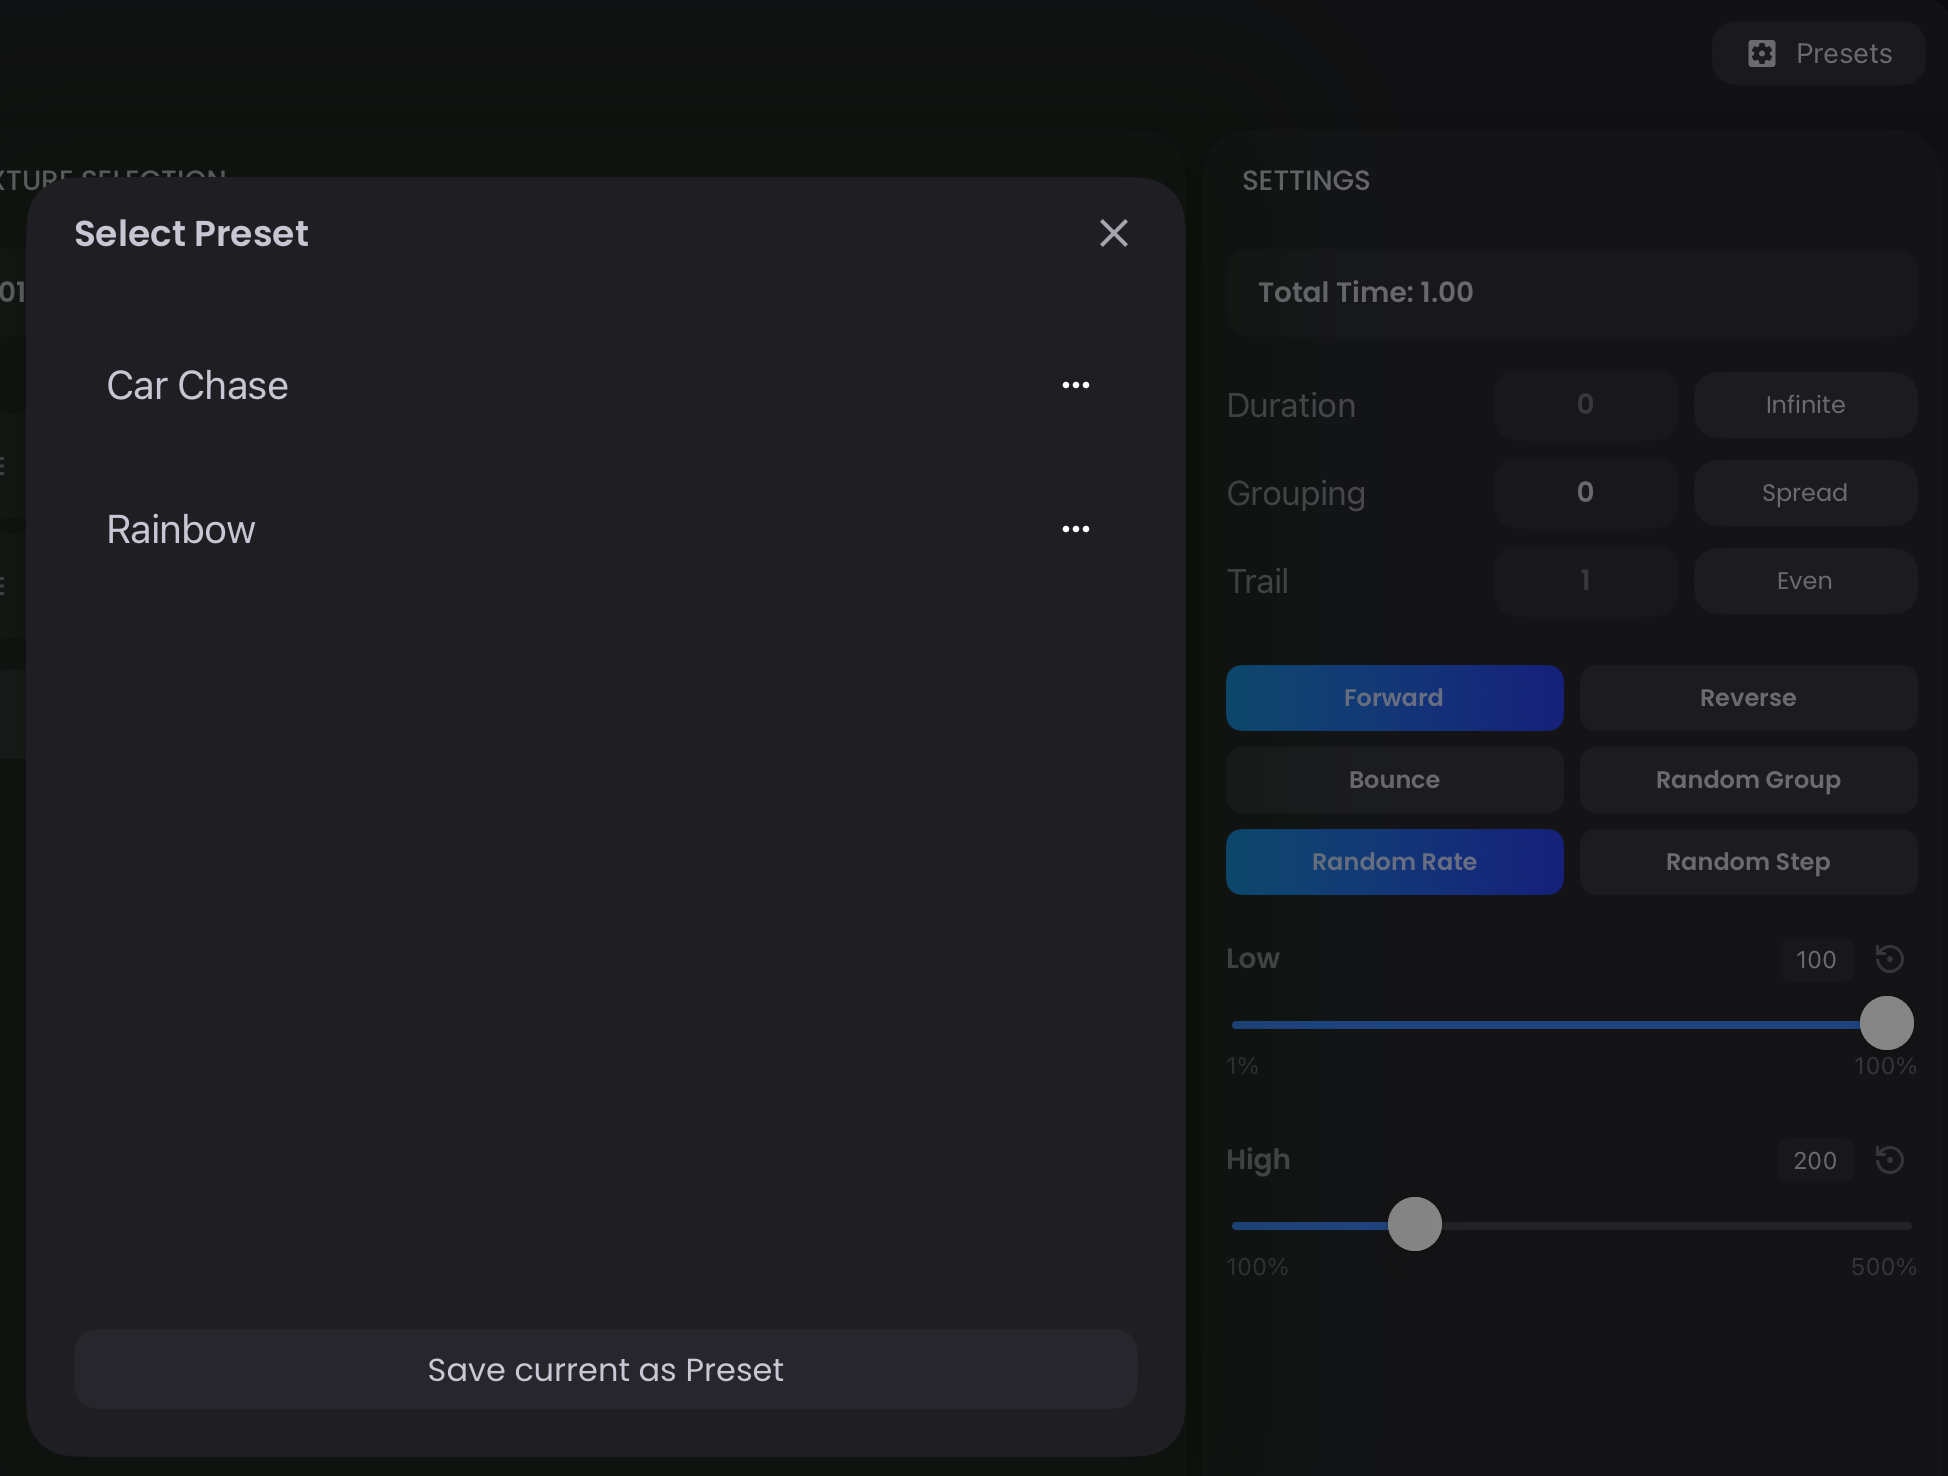
Effects take time to adjust and perfect. If you want to reuse an Effect on another set of lights, you can save an Effect Preset:
- Tap the
Presetsbutton in the top right - Press
Save current as Preset - Name your preset
- To load an Effect Preset, tap on an existing preset
Recording an Effect in a Look
Once you're happy with your Effect, record it into a Look:
- Play the Effect first
- Record your Look as normal
Adding or Removing an Effect from a Look
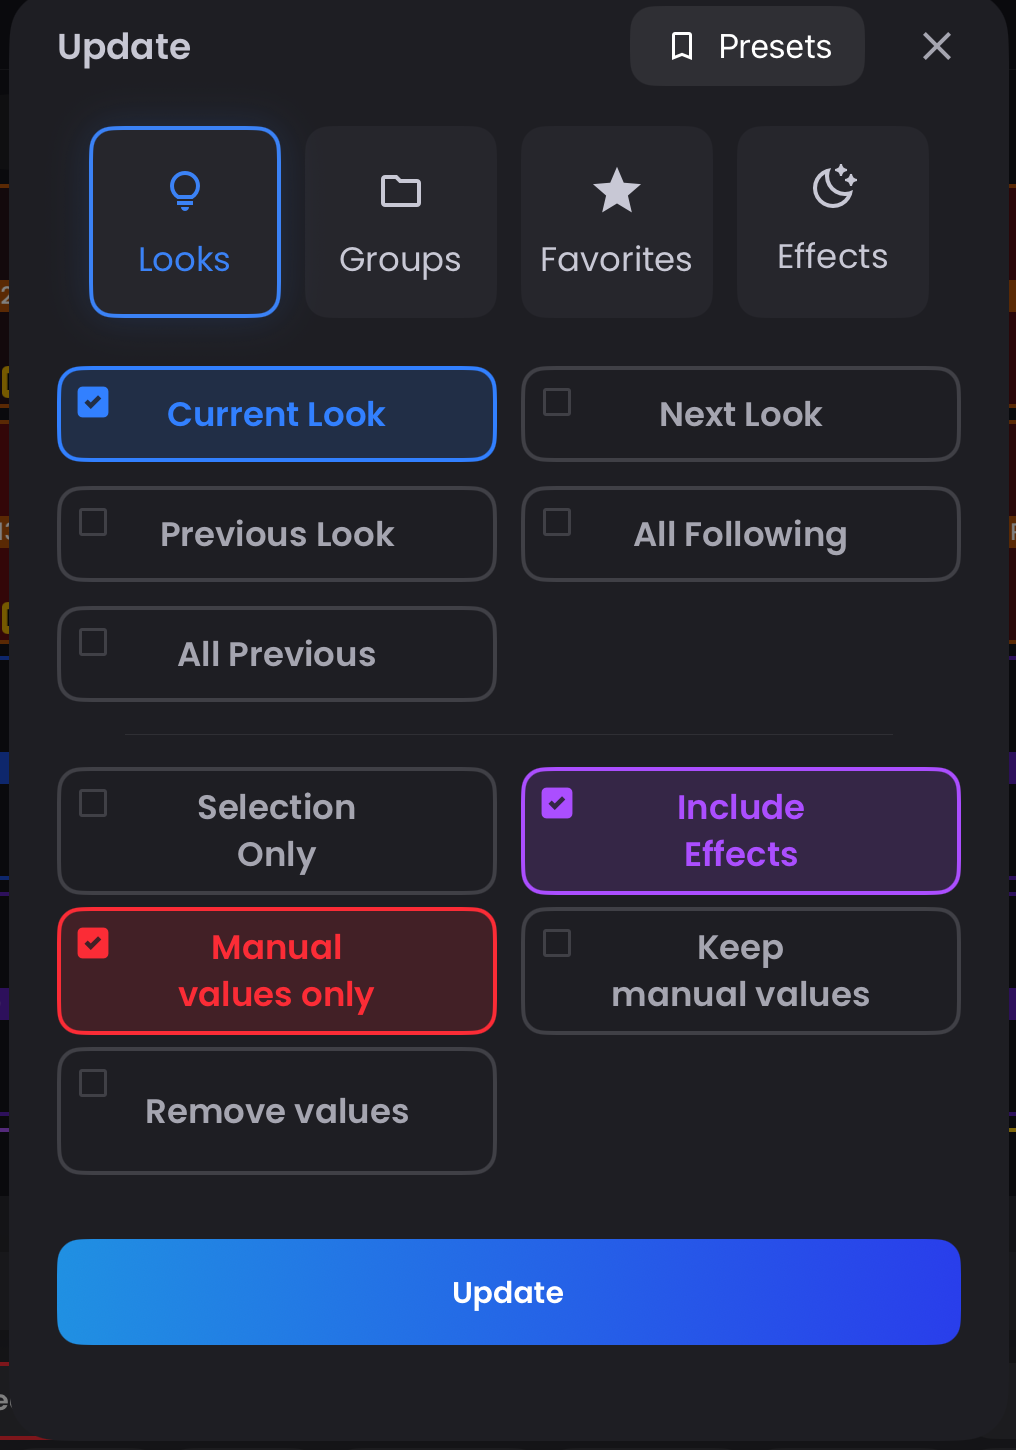
To add or remove an Effect from a Look:
- Go to that Look
- Stop playing the Effect using the
Stopbutton or start playing the Effects you want added - Press Update to update the Look making sure to have
Include Effectsselected
Managing Effects
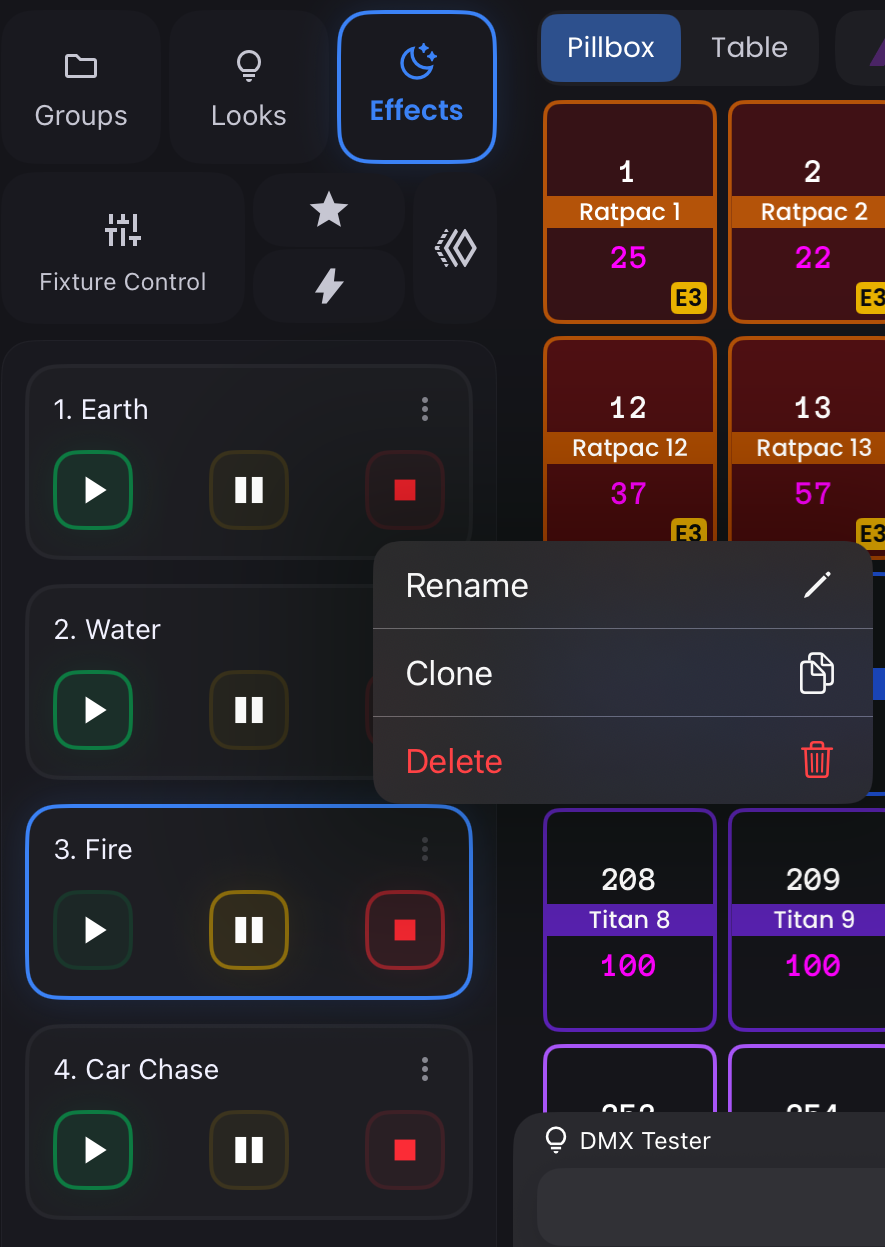
To rename, clone, or delete an Effect, tap the three-dots (more_vert) to the right of the Effect in the Sidebar or in Effects Expanded.
More Help
For advanced Effect workflows, techniques, and in-depth tutorials, visit the Blackout Help Center or check out the Effects playlist on YouTube.